The single feature that most changes how a pressure washer feels to use is not the pump or the engine but the connector between the gun and the wand. A pressure washer wand quick connect is the coupler that lets an operator snap the wand off the gun and click a different one on, in seconds, without tools. Owners who have never used one do not miss it; owners who have used one will not go back. It is the difference between wrestling a threaded joint with wet hands every time you switch from a turbo nozzle to a fan tip, and simply clicking a new piece into place. When Dana started cleaning her deck, she had one rigid wand and a thread that fouled after every job. Adding a quick connect let her change from a fan tip to a soap wand to a surface cleaner attachment without breaking her grip or her patience, and the whole machine became far more useful for the price of a small adapter.
A pressure washer wand quick connect is a two-part connector, a plug and a socket, that joins the spray gun to the wand and lets it be removed by pulling a collar instead of unscrewing a thread. The same connector standard usually carries through to the nozzle and to accessories, so a whole ecosystem of wands, tips, and attachments share one fast interface. This guide explains what a wand quick connect is, how the plug and socket work, the common sizes and standards, why the connector makes swapping attachments so much faster, how to install and seal one, the leaks and failures that come with them, and how to choose a quality set that lasts.
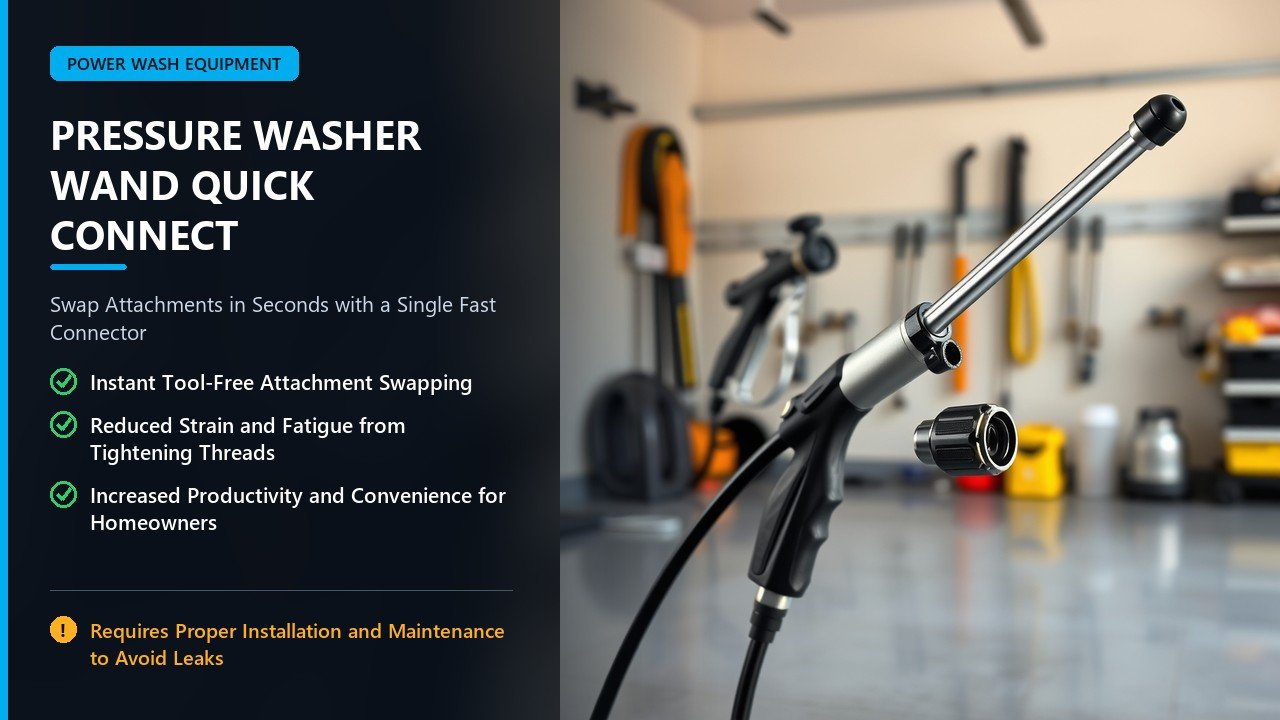
What a Wand Quick Connect Is
The connector solves a specific problem, and understanding the problem explains the design.
The threaded joint it replaces. On older or basic machines, the wand threads directly onto the gun, a fine-threaded joint tightened by hand. It works, but every wand change means unscrewing a wet, gritty joint and re-threading a new one, which invites cross-threading and wasted time. The quick connect replaces that thread with a push-and-click interface.
The plug and the socket. A quick connect has two halves: a plug, often on the wand, and a socket or coupler, often on the gun, which mates over the plug and locks with a spring-loaded collar. Pull the collar back, and the plug releases. There is no thread to align and no torque to apply, so the swap takes seconds even with wet hands.
Sealing with an o-ring. The joint seals with an internal o-ring rather than thread tightness, so the quality of the seal depends on the o-ring and the machined faces, not on how hard it is tightened. This is why quick connects can weep if the o-ring is worn or the faces are gritty, and why keeping a few spare o-rings on hand solves most of their problems. Our guide to replacing a weeping seal covers the fix.
Where it appears. The wand quick connect sits in one or both of two places: between the gun and the wand, and between the wand and the nozzle. The gun-to-wand connector swaps entire wands, while the wand-to-nozzle connector swaps just the tip. A well-equipped machine uses both, giving fast changes at each level. Our guide to hose and wand fittings maps the full connector layout.
Plug and Socket Standards
Quick connects are not universal, and matching the standard is the usual trip-up.
1/4-inch quick connect is the widespread standard. Most residential and light commercial pressure washers use quarter-inch quick connect fittings, a well-known standard with a collar lock and an o-ring seal. It is the de facto standard for wands, nozzles, and attachments in the consumer and prosumer range, which makes it easy to build a set from different brands that share the standard.
Plug styles and compatibility. Within quarter-inch quick connect there are variations in plug length and collar that can prevent a perfect mate between brands, though most comply closely enough to interchange. The prudent approach is to buy plugs and sockets as a matched set from one maker, so the collar and plug geometry are guaranteed to fit, then standardize the rest of your kit on that system. Our fitting guide’s standard section helps identify your type.
The thread side matters too. A quick-connect plug always has a threaded end that screws into your gun, wand, or nozzle, and that thread is commonly M22 on pressure washers, with some NPT on certain brands. The quick connect is the fast joint; the thread behind it is the permanent one, so you must match both the quick-connect standard and the thread to your machine. Mismatched threads are the most common reason a new quick connect will not fit.
Nozzle quick connect is separate. The nozzle tip has its own quick connect, also usually quarter-inch, but it is a different plug than the gun-to-wand connector in practice, so do not assume one works for the other. Buy the nozzle connector for nozzles and the wand connector for wands. Our guide to nozzle selection covers the tip side.
| Location | Connector | Swaps |
|---|---|---|
| Gun to wand | Wand quick connect | Whole wands |
| Wand to nozzle | Nozzle quick connect | Tips |
| Hose to gun | Hose quick connect | Hoses |
Why Quick Connect Changes the Machine
The connector is a small part with an outsized effect on how a pressure washer gets used.
Fast attachment changes. Switching from a fan tip to a turbo nozzle, adding a soap applicator, mounting a surface cleaner, or changing to a different wand all take seconds with a quick connect. That speed turns the machine into a multi-tool, because the operator actually uses the right attachment for each task instead of making do with whatever is threaded on.
Less wear and better sealing. A quick-connect joint has no thread to cross or strip, so the connection stays clean and seals reliably, and the o-ring protects the metal faces from scoring. Threaded joints, by contrast, wear and gall with repeated use and eventually leak. The quick connect’s simpler mechanics are kinder to the whole system. Our guide to quick connect fittings covers the leak-free design.
Better safety while swapping. Changing a wand on a threaded joint under pressure is risky, because the operator has to handle a live connection. With a quick connect, the operator releases the trigger, locks the gun off, pulls the collar, and swaps, a cleaner, safer routine that reduces the chance of a sudden release. Safety begins with a controlled, deliberate change.
Access to a wider tool set. Because quick connect is a standard, it opens the machine to a huge range of wands, extensions, brushes, and attachments that share the interface. The operator is no longer locked to the wand that came with the machine, and can add a telescoping wand, a washing brush, or a surface cleaner without adapters. The standard is the gateway to the ecosystem.
Installing and Sealing a Wand Quick Connect
Fitting a quick connect is a small job, but the details decide whether it seals.
Match the thread and the standard. Before buying, confirm the thread on your gun and wand, usually M22, and the quick-connect standard, usually quarter-inch. Both must match, or the adapter will not fit. Measure or photograph the threads if unsure, and buy a matched plug-and-socket set from one maker. Our fitting guide covers the identification.
Apply the right sealant, if any. A quick-connect plug’s threaded end may need thread sealant, typically PTFE tape or a liquid sealant appropriate for the fitting, to seal the thread behind the quick-connect. Do not overtighten, since these are often brass and easy to crack. Follow the maker’s guidance, and remember the quick-connect itself seals on its o-ring, not on the thread. Bad threading is the source of most leaks, so take the sealant step seriously.
Hand-tight plus a snug turn. Tighten threaded ends hand-tight, then a small extra turn with a wrench, enough to seat without crushing the fitting. Over-torquing brass fittings strips or cracks them and creates a leak far worse than the one avoided. A gentle, firm touch is correct.
Test and inspect the joint. After assembly, pressurize briefly and check the joint for weeping. A drip at the quick connect usually means a missing or worn o-ring, grit on the seal face, or an insufficiently sealed thread behind it. Clean the face, replace the o-ring, or reseal the thread as needed. Our weeping-seal guide covers the repair.
Keep the sealing faces clean. Grit and hard water scale on the o-ring or the sealing face are the enemy. Wipe the plug and socket clean when you swap wands, and store them capped. A quick connect that is kept clean stays dry for years; one packed with grit weeps constantly.
Troubleshooting Wand Quick Connect Problems
Quick connects are simple, so their problems are few and each has a clear cause.
Wand quick connect leaks. The most common issue, usually a worn or missing o-ring, grit on the seal, or a loose or under-sealed thread. Replace the o-ring, clean the faces, and reseal the thread. If the leak is between the plug and socket, the o-ring is the suspect.
Wand will not lock in. A collar that will not catch usually means a wrong-standard plug, a dented collar, or debris in the socket. Confirm the standard matches, examine the collar for damage, and clean the socket. Forcing a mismatched plug damages both halves.
Wand pops off under use. A wand that releases on its own is dangerous and indicates a worn collar spring or an incomplete lock. Stop using it and replace the connector, because a wand that lets go under pressure can whip. Never tape a failing quick connect and keep working.
Reduced flow after fitting. A quick connect with a narrow internal bore can restrict flow, especially on a high-flow machine. Look for full-flow or high-flow rated connectors on a large machine, and avoid stacking several connectors in series, which multiplies the restriction. Our guide to how diameter affects flow explains the relationship.
Corroded or stuck connector. Left wet and stored, a brass connector can corrode and seize. A little penetrating oil and a gentle wiggle usually frees it; going forward, dry and cap the connectors after each use. Prevention beats persuasion on stuck fittings.
Choosing a Quality Quick Connect Set
A few checks separate a connector that lasts from one that leaks from the first job.
Brass or stainless, rated above your machine. Choose connectors in brass or stainless steel rated for a pressure above your machine’s working pressure with margin. Cheap plated or pot-metal fittings crack or strip under pressure, and at high pressure a failure is a safety issue. The pressure rating is not a suggestion.
Matched set from one maker. Buy plugs and sockets as a matched set so the geometry and collar fit perfectly, then standardize the rest of your kit on that system. Mixing brands within quarter-inch quick connect often works but can introduce leaks; a single maker removes the guesswork.
Full-flow bore on high-flow machines. On a machine with generous flow, choose full-flow connectors whose bore does not neck down the stream. The restriction is invisible in the hand but shows up as lost pressure at the nozzle, and full-flow connectors protect the machine’s output. Our flow guide covers the sizing.
Smooth collar and spring. The collar should glide and the spring should snap firmly, locking with a clear click. A gritty, sloppy collar means a cheaper mechanism that will slip, so feel the action before committing, or favor a reputable brand known for smooth, reliable locking.
Replaceable o-rings and a spare kit. Choose connectors with commonly available o-rings that you can replace cheaply, and keep a small kit of spares in the sizes your setup uses. Since nearly all quick-connect leaks are o-ring related, a few cents of spares prevents an hour of frustration. Our weeping-seal guide pairs well with this.
Standardize the whole kit. Once you choose a standard, use it everywhere, gun-to-wand, wand-to-nozzle, and on every accessory, so any piece connects to any other without adapters. A fully standardized kit is the fastest, most reliable, and least cluttered way to run a pressure washer. Our fitting guide’s standard section helps plan the set.
Quick Connect Versus Threaded Joints
The quick connect wins on convenience, but a fair comparison shows where each still has its place.
Speed and convenience. The headline difference is time. A threaded joint takes a wrench or a firm hand and a careful thread alignment, while a quick connect takes a pull and a push. On a job that swaps attachments repeatedly, that difference compounds over a day into real minutes saved and far less frustration. For anyone who uses more than one wand or nozzle, quick connect is the clear practical winner.
Sealing and wear. Threaded joints rely on the thread and sealant to hold pressure and tend to wear, gall, and eventually leak with repeated assembly. Quick connects rely on an o-ring and machined faces, which seal reliably and protect the metal from repeated wear. The recurring cost of a quick connect is cheap o-rings; the recurring cost of a threaded joint is a worn thread that eventually needs re-taping or replacing.
Cost and simplicity. Threaded joints cost nothing extra because they are simply the ends of the parts, and they cannot lose an o-ring or jam a collar. Quick connects add a small purchase and a few more failure points, specifically the o-ring and the collar. For a machine that never changes attachments, the threaded joint is arguably simpler; for one that does, the quick connect earns its keep immediately.
Flow path. A threaded joint has no internal bore to restrict flow beyond the fitting itself, while a quick connect adds a bore that, if narrow, can restrict a high-flow machine. Full-flow quick connects eliminate this concern, but it is a real consideration on large machines and a reason to choose connectors carefully. Our guide to flow and diameter explains the effect.
The verdict. For a working pressure washer, quick connect is the better default, offering speed, sealing, and access to a standard ecosystem at the cost of a small purchase and a few o-rings to maintain. Threaded joints remain fine for parts that never change, but as a working interface, quick connect has essentially won, and most machines now ship with it. Our fitting guide’s standard section reflects that trend.
Using Quick Connect Across a Full Kit
The real payoff of a standard connector comes when the whole kit shares it, so building the kit deliberately is worth the effort.
Standardize the working ends. Put the same quick-connect standard at the gun, the wand, and the nozzle, and on every accessory, so any piece connects to any other without adapters. A fully standardized kit swaps in seconds and stores without a tangle of adapters. This is the single most useful thing an owner can do to make a machine pleasant to run.
Build a wand set. With quick connect, an owner can keep a short wand for detail work, a rigid extension for medium reach, and a telescoping wand for height, and swap among them as the job changes. The standard turns one machine into several tools, which is the whole reason the connector exists. Our guide to wand attachments covers the options to build around.
Include a nozzle set. A quick-connect nozzle holder with a range of tips lets the operator change fan angles and soap mode in seconds, which is the fastest way to match the spray to each surface. Pair the wand quick connect with a nozzle set for the full speed benefit. The two connectors together make the machine genuinely adaptable.
Add the accessories that share the standard. Surface cleaners, washing brushes, foam cannons, and undercarriage wands all come in quick connect, so a standardized kit grows without adapters. Before buying any accessory, confirm it uses your standard, and the kit stays clean and fast. Our guide to worthwhile accessories helps prioritize.
Keep spares and a service habit. Stock a few o-rings, a spare connector or two, and a small wrench for the threaded ends, and make cleaning the sealing faces part of the after-job routine. A standardized kit that is maintained this way runs for years with almost no downtime, and the occasional leak is a two-minute fix. Our weeping-seal guide covers the routine.
Common Wand Quick Connect Mistakes
Confusing the wand and nozzle connectors. They are different plugs in different places. Buy the right one for each joint.
Mismatched thread or standard. A connector with the wrong thread or plug style will not fit or seal. Match both to your machine.
Over-tightening brass fittings. Cranking a brass connector cracks or strips it. Snug, not brutal, is correct.
Skipping the o-ring. A missing or worn o-ring guarantees a leak. Keep spares and replace freely.
Letting grit and scale build up. A dirty seal face weeps no matter how good the connector. Clean and cap after use.
Running a failing connector. A connector that pops off under pressure is dangerous. Replace it immediately instead of taping it.
Stacking connectors unnecessarily. Each connector adds a flow restriction. Use the fewest joints your setup needs.
Frequently Asked Questions
What is a pressure washer wand quick connect? A plug-and-socket coupler between the spray gun and the wand that lets wands be swapped by pulling a collar instead of unscrewing a thread.
What size is a pressure washer wand quick connect? Most residential and light commercial machines use quarter-inch quick connect with an M22 thread behind it, though some brands differ. Match both the standard and the thread to your machine.
Can I add a quick connect to any pressure washer? Usually yes, with the right thread adapter. An adapter converts a threaded or non-standard machine to a standard quick connect system.
Why does my quick connect leak? Most often a worn or missing o-ring, grit on the seal face, or an under-sealed thread behind the connector. Replace the o-ring, clean the faces, and reseal the thread.
Is a quick connect the same as a quick coupler? Largely yes in pressure washing. Quick connect, quick coupler, and quick-disconnect all refer to the same plug-and-socket collar-lock interface.
Do quick connects reduce pressure? A well-made full-flow connector has minimal effect. A narrow-bore connector, or many stacked in series, can restrict flow, so choose full-flow on high-flow machines.
Final Thoughts on the Pressure Washer Wand Quick Connect
The pressure washer wand quick connect is a small adapter that quietly transforms an entire machine, turning wand changes from a wet, threaded struggle into a two-second click and opening the washer to a whole ecosystem of wands, tips, and attachments that share one standard. It is the gun-to-wand joint that matters here, distinct from the nozzle quick connect at the tip and the hose connector behind the gun, and its simple plug-and-socket design seals on an o-ring and locks with a collar, which is both its convenience and the reason a worn o-ring is its main point of failure.
Choose a matched, brass or stainless set rated above your machine and preferably full-flow for high-flow units, install it with the thread behind it properly sealed and hand-tight, and standardize the whole kit on one standard so every piece connects to every other. Keep the sealing faces clean, dry and cap the connectors after use, and carry a few spare o-rings, because nearly every quick-connect leak is a five-cent fix. Replace, never tape, a connector that pops off under pressure, and treat a failing joint as the safety matter it is. Do all of that, and the wand quick connect becomes the invisible feature that makes the machine faster, safer, and far more versatile than it was with a plain threaded wand.