Every weekend, the same ritual played out in Jeff’s garage. He would drag the pressure washer out from behind a shelf, untangle a fifty-foot hose that had somehow tied itself in three knots, hunt for an extension cord long enough to reach an outlet, connect the garden hose, and by the time everything was ready, twenty minutes had vanished and he had not cleaned a single square inch. After years of this, he did something different. He mounted the machine on the wall, ran a proper water line, added a reel, and wired a dedicated outlet. Now he walks in, pulls the hose, and starts cleaning in about fifteen seconds. A wall mount electric pressure washer setup is what transformed that garage from a storage room into a genuine wash bay.
Wall-mounted pressure washer systems have become a favorite among detailers, car enthusiasts, and anyone who is tired of dragging equipment around. The idea is simple: instead of moving the machine to the mess, you keep the machine in one smart place, permanently connected to water and power, with the hose on a reel and the controls at waist height. This guide explains exactly what these setups are, why they are worth building, how to plan and install one correctly, and the mistakes that turn a clean project into a leaky, tripped-breaker headache.
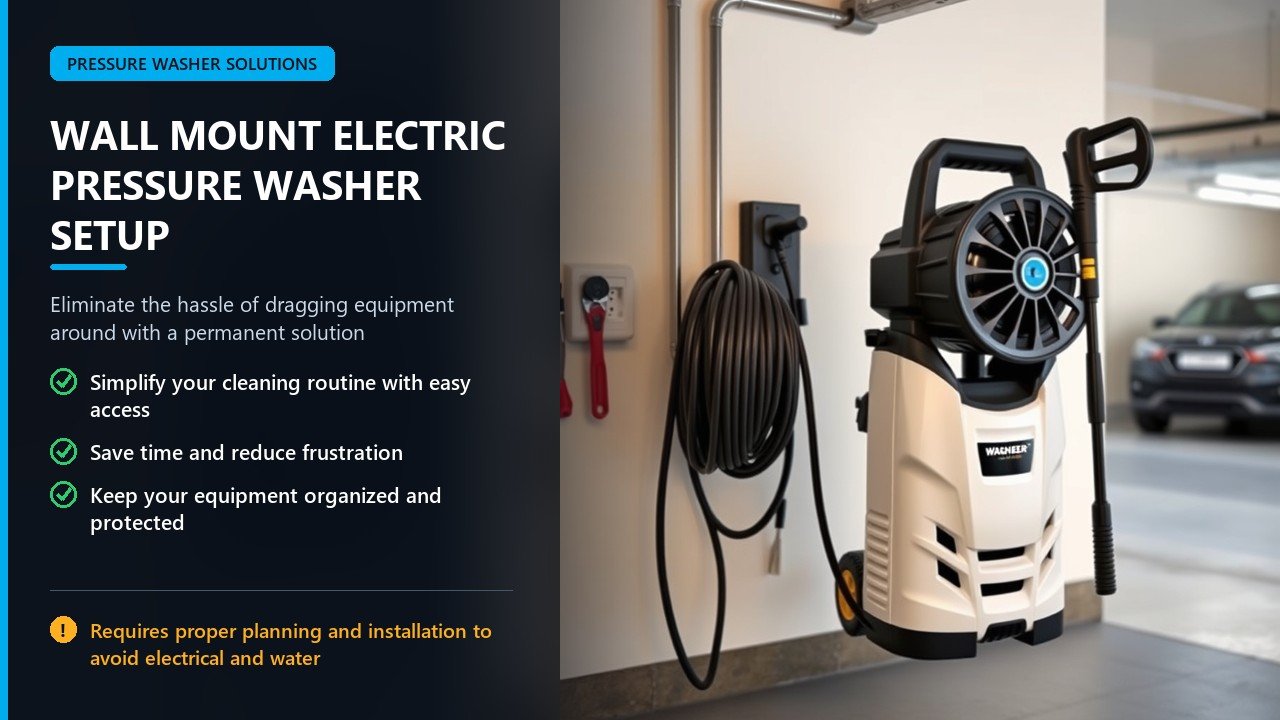
What a Wall Mount Electric Pressure Washer Setup Actually Is
At its heart, a wall mount setup is an ordinary electric pressure washer with a permanent home on a wall. The machine itself still has the same three essential parts — a motor, a pump, and a water inlet. The motor drives the pump, the pump pressurizes the water, and a high-pressure hose carries it to the trigger gun and wand. The only difference is that the machine is fixed to the wall instead of sitting loose on the floor.
What makes it a “setup” rather than just a mounted machine is the supporting system around it. A complete installation typically includes a sturdy shelf or bracket, a hose reel, a short inlet hose connecting the wall plumbing to the machine, a whip line from the machine’s outlet to the reel, quality quick connectors, and a dedicated electrical supply with ground-fault protection. Put those pieces together in the right order and you get a station that is always ready.
Why People Mount Their Pressure Washer
The appeal is not just looks. A wall mount setup changes how you work in ways that save real time and effort.
It eliminates setup time. This is the number one benefit. Because the machine stays connected to water and power and the hose stays on a reel, there is nothing to drag out, untangle, or string together. You grab the gun and go. Studies of workflow consistently show that removing a long preparation step makes people do a task more often — and a cleaner car is the natural result.
It frees up floor space. A garage is prime real estate. Mounting the machine at waist height on the wall clears the floor for vehicles, bikes, and storage, and it gets the hoses off the ground where they become tripping hazards.
It keeps things organized and safer. Hoses and cords stored on reels and hooks stay out of the way and away from kids and pets. A locked bracket on some models even discourages casual theft from an open garage.
It is easier on your body. Controls at waist height mean no bending over to reach the machine. Pulling a smooth hose off a reel beats wrestling a tangled pile every single time.
It looks professional. A tidy wall with a mounted machine, a matching reel, and clean plumbing turns a cluttered corner into a workspace you are proud of.
| Factor | Portable Unit on the Floor | Wall Mount Setup |
|---|---|---|
| Setup time | Minutes of dragging and untangling | Seconds — grab and go |
| Floor space | Occupied by machine and coiled hoses | Cleared |
| Hose management | Tangles, kinks, trip hazards | Stored neatly on a reel |
| Ergonomics | Bend and reach to the floor | Waist-height controls |
| Fleet use | Fine for one machine in one spot | Ideal for a fixed cleaning bay |
| Portability | Easy to move to another site | Fixed to one wall |
The Core Components of a Great Setup
A polished installation is a small system, and every part matters. Here is what goes into it, from the wall outward.
The machine. Any compact electric pressure washer can work. Popular choices among enthusiasts include Active, Kranzle, AR Blue Clean, and Karcher units. Look for a fairly compact form factor, a clear water inlet location, and a build you can service or upgrade later. If you plan to detail cars, a machine around 1,000 to 1,500 PSI with 2.0 to 2.3 GPM is a sweet spot for safe, effective washing. Explore quality electric pressure washers and accessories to find a model that suits your wall.
The shelf or bracket. You need something strong enough to hold the machine’s weight and absorb its vibration. Many people skip the original casing and mount just the pump-and-motor unit for a cleaner look, but you can also simply set a cased machine on a heavy-duty shelf. Choose a metal shelf — steel or aluminum — rather than plain particle board, because vibration and moisture destroy cheap shelving over time.
The hose reel. This is the “soul” of the setup. A quality reel with a smooth swivel keeps a 50-foot hose ready and tangle-free. Both hand-crank and retractable reels work; hand-crank reels are often more robust and simpler. Mount the reel as close as practicable to where you will actually use the hose, so one pull reaches both the garage interior and the driveway.
The hoses. You typically need three: a short flexible inlet hose from the wall plumbing to the machine’s inlet, a 50-foot (or longer) high-pressure hose on the reel, and a short whip line from the machine’s outlet to the reel. Use 3/8-inch threaded ends on the high-pressure side, and keep the inlet hose flexible so the machine can move slightly under load without stressing rigid plumbing.
Quick connectors. Brass or stainless-steel 3/8-inch quick connects let you snap hoses on and off fast. Avoid plastic connectors — they crack, leak, and fail under pressure. Metal quick connects cost a little more but last for years.
The plumbing. A dedicated water line feeds the machine. A general rule is to use a minimum 1/2-inch line, with 3/4-inch ideal for a single high-flow pressure washer. Adding valves lets you isolate, drain, and even bypass a filtration system if you use one.
The electrical supply. A dedicated, GFCI-protected circuit keeps the machine safe and supplied. More on this below, because it is the detail people most often get wrong.
To keep the build organized, here is the component checklist most setups share, along with what each part does.
| Component | Purpose | Buying Tip |
|---|---|---|
| Electric pressure washer | Supplies pressure and flow | Compact unit, clear inlet, serviceable |
| Shelf or bracket | Holds the machine at waist height | Steel or aluminum, anchored into studs |
| Hose reel | Stores the high-pressure hose neatly | Quality swivel, positioned near the door |
| Inlet hose | Links wall plumbing to the machine | Flexible, 2–5 ft, correct diameter |
| Whip line | Connects machine outlet to the reel | Braided, 3/8-inch ends |
| High-pressure hose | Carries water to the gun | 50 ft, kink-resistant rubber, 3/8-inch ends |
| Quick connectors | Fast, tool-free connections | Brass or stainless, not plastic |
| Water line + valves | Feeds and isolates the machine | 1/2 in minimum, 3/4 in ideal |
| GFCI outlet + circuit | Safe, dedicated power | Dedicated 15–20 amp, GFCI protected |
A Real-World Build: Two-Car Garage
To see how the pieces fit, walk through a typical two-car garage. The owner picks the wall shared with the house utilities — it already has a water line and an outlet nearby. She marks a spot at waist height for the machine and a spot beside it for a hand-crank reel, positioned so a 50-foot hose reaches the far corner of the garage and out to the driveway.
She adds a plywood backing panel between the studs to give the shelf and reel solid, vibration-resistant mounting. A short braided inlet hose links the wall valve to the machine’s inlet, while a two-foot whip line runs from the outlet to the reel. Metal quick connectors join the long hose, the gun, and the reel so she can swap parts without tools.
On the electrical side, she confirms a dedicated 20-amp circuit with a GFCI outlet. The machine plugs in permanently, and the cord is routed neatly along the wall so it never crosses the floor. Total parts cost is modest compared with the machine itself, and the install takes an afternoon.
The first time she pulls into the garage, presses the switch, and starts washing within ten seconds, the payoff is obvious. No dragging, no untangling, no tripping over hoses. That is the whole point of a wall mount setup: it removes friction from a task you do repeatedly, so you actually do it more often and enjoy it more.
Planning the Layout Before You Drill Anything
Good installations start on paper, not on the wall. Measure and think first, and the project goes together smoothly.
Pick a wall near both water and power. The ideal spot is close to a cold water supply and a grounded outlet, on a load-bearing surface such as concrete, brick, or a stud-framed wall. Avoid placing the machine near a furnace, water heater, or anything sensitive to moisture.
Choose the height carefully. Waist height is the ergonomic goal. Confirm you can reach the controls comfortably and that the bowl or shelf keeps the machine’s inlet low enough to drain fully for winterizing. Some setups include a low point in the plumbing specifically so the lines can be drained before freezing weather.
Check the water flow. Before committing, measure your actual flow rate using a marked bucket and a stopwatch. Your supply must meet or exceed the machine’s recommended minimum GPM, or the pump will starve and perform poorly. Running two high-flow machines at once requires an even larger line.
Plan the reel position. Decide where the hose needs to reach. Place the reel so a single 50-foot hose covers the whole vehicle and the surrounding area. Mounting the reel nearest the garage door lets you pull the hose straight out to the driveway.
Decide on indoor or covered outdoor placement. An outdoor install should sit under an overhang or inside a sheltered structure so rain and sun do not shorten the machine’s life. A garage wall is ideal because it is protected and adjacent to power and water.
The Electrical Side: Do It Right the First Time
Water and electricity are a dangerous combination, so the electrical side deserves special care. Getting it right is not optional.
Install a dedicated circuit. At minimum, provide a dedicated 15-amp circuit, but a 20-amp circuit is strongly recommended for safety margin. Check your machine’s rated amperage and remember that accessories like a foam cannon or a larger nozzle can push total draw higher than the machine’s base rating.
Add GFCI protection. A ground-fault circuit interrupter cuts power instantly if current starts leaking to ground — exactly the scenario if a cord is damaged or water reaches a live part. The outlet serving a pressure washer should absolutely be GFCI protected.
Ground everything properly. A proper equipment ground provides the fault path that lets a breaker trip instead of energizing the machine’s frame. Never defeat or remove a grounding pin.
Avoid extension cords. Most manufacturers advise against them. If one is unavoidable, use a short, heavy-gauge cord rated for the amperage. An undersized or overly long cord causes voltage drop, overheating, and motor damage.
Hire a professional if unsure. If you are not confident running a circuit or installing a GFCI outlet, call a licensed electrician. The stakes — fire and electrocution — are far too high for guesswork.
Step-by-Step Installation
With the plan set, the physical work follows a logical order. Take it slowly and check each connection.
Step 1 — Prep the wall. Locate the studs. For concrete or brick, drill with a masonry bit and use anchors rated for the machine’s weight. For stud walls, drive lag bolts directly into the studs. Never rely on drywall anchors alone — vibration will pull them out. If needed, add a plywood backing panel to spread the load and give you something solid to mount to.
Step 2 — Mount the shelf or bracket. Use a level, mark the holes with the bracket as a template, and fasten it securely. Confirm it can hold the machine’s weight plus vibration before placing anything on it.
Step 3 — Install the hose reel. Mount the reel at its planned height, ideally near the garage door so the hose pulls straight out. Check that the reel’s swivel rotates freely.
Step 4 — Run the plumbing. Install the water line and a secure mounting point for the inlet. Add valves so you can isolate the machine and drain the line for winter. Use thread tape on all threaded connections for a leak-free seal.
Step 5 — Connect the machine. Attach the flexible inlet hose to the wall plumbing and the machine’s inlet. Connect the whip line from the machine’s outlet to the reel, and run the long high-pressure hose from the reel to the gun. Use metal quick connectors at each join.
Step 6 — Wire the power. Plug into the dedicated, GFCI-protected outlet. If you cut the cord for a cleaner install, do it competently and only with the plug side, keeping the machine end intact.
Step 7 — Test at low pressure. Turn on the water and let it run through the system to purge air before switching on the motor. Then run the unit and test the trigger, watching every fitting for drips. Tighten anything that weeps, then retest.
Choosing Hoses, Reels, and Nozzles
The accessories around the machine decide how pleasant the setup feels day to day.
High-pressure hose. A 50-foot, kink-resistant rubber hose is the sweet spot — long enough to walk around a vehicle, short enough to manage. Premium hoses survive repeated flexing far better than stiff PVC hose.
Reel. A quality hand-crank reel with a smooth swivel is robust and simple. Retractable reels add convenience but have more parts to fail. Position matters more than the style.
Inlet and whip hoses. Keep the inlet flexible (2 to 5 feet is common) so the machine can shift under load. Use a braided whip line on the outlet with 3/8-inch ends.
Nozzles. Match tips to the surface. A wider white or soap tip protects paint; narrower tips handle concrete. For car washing, a foam cannon plus a gentle tip gives a safe, effective result. Our guide to pressure washer nozzle colors and accessories explains which tip does what.
Winterizing and Maintenance
A permanent setup still needs seasonal care, especially in freezing climates.
Winterize the system. Before the first freeze, isolate the water supply, drain all lines, and clear the machine, hoses, and reel of water. A low point in your plumbing makes draining easy. A frozen pump or hose cracks and fails. Our guide on how to winterize a pressure washer walks through the full routine.
Clean the inlet filter. Sediment clogs the inlet filter and starves the pump. Check and clean it each season.
Check hoses and o-rings. Replace any hose with kinks, bulges, or wear, and swap flattened or cracked o-rings immediately. Keep spares on the shelf.
Service the pump. Change pump oil on schedule with the correct non-detergent oil. Our article on pressure washer pump oil covers the types and intervals.
Inspect the electrical connection. Confirm the GFCI works, the outlet is dry, and the cord is undamaged before each season of use.
Common Mistakes to Avoid
Mounting on drywall without reinforcement. Vibration and weight will pull anchors loose. Always fasten into studs, masonry, or a backing panel.
Undersizing the water supply. A too-small or shared line starves the pump and kills performance. Use a 1/2-inch minimum, 3/4-inch ideal.
Skipping GFCI and a dedicated circuit. This is the most dangerous shortcut. Protect the circuit and give the machine its own supply.
Using cheap plastic fittings. They crack and leak. Buy brass and stainless.
Forgetting to winterize. Trapped water freezes and cracks the pump and hoses.
Placing the machine where the hose cannot reach. Check reach before you commit to a wall location.
Over-tightening threads. Cranking fittings too hard strips threads and causes leaks. Tighten snug, not brutal.
Ignoring amp draw from accessories. A foam cannon or big nozzle can push total draw over a 15-amp circuit. Plan headroom.
Frequently Asked Questions
Can any electric pressure washer be wall mounted? Practically any compact electric unit can sit on a wall-mounted shelf and be connected permanently, though some models with built-in brackets are easier. Integrated vertical models with fragmented internals are harder to strip down.
Do I need a plumber and an electrician? Not always. If you already have a suitable water supply and a grounded outlet, a confident DIYer can handle the mounting and connections in an afternoon. Professional help is worth it when you need a new water line or electrical circuit.
What size water line do I need? A 1/2-inch line is the minimum; 3/4-inch is ideal for a single high-flow machine. Measure your flow rate to confirm it meets the machine’s requirement.
What circuit do I need? A dedicated 15-amp circuit at minimum, with 20 amps strongly recommended, plus GFCI protection. Check the machine’s amp draw.
What hose length should I use? A 50-foot high-pressure hose covers most single-vehicle and small-area jobs. Add length only if your layout requires it.
Is a wall mount setup worth the cost? For a fixed cleaning bay you use often, yes. The convenience, space savings, and organization pay off quickly. If you need one machine across multiple sites, a portable unit is more flexible.
Can I run hot water through my wall mount setup? Only if the machine and hoses are rated for it. Most residential electric units are cold-water only. If you need heat, look at a heated electric unit designed for it.
What if I don’t have a water spigot nearby? You can still build the setup by running a dedicated water line to the machine’s inlet or by plumbing a feed from an existing supply. Use valves so the line can be isolated and drained.
Will a long hose reduce my pressure? A well-made 50-foot hose has negligible effect. Oversized lengths or undersized diameter hoses can reduce performance, so match the hose to the machine and keep the run reasonable.
Final Thoughts
A wall mount electric pressure washer setup is one of the most satisfying upgrades you can make to a garage or shop. It takes the chore out of cleaning by removing every step between deciding to wash something and actually washing it. The machine stays ready, the hose stays tangle-free, the floor stays clear, and the whole wall looks like a professional wash bay instead of a storage pile.
Build it in the right order: plan the layout around water and power, use a strong shelf or bracket anchored into structure, add a quality reel and metal quick connectors, run a properly sized water line, and supply the machine with a dedicated GFCI-protected circuit. Test at low pressure, keep the o-rings healthy, and winterize before the cold. Do that, and you will spend your time cleaning instead of untangling — every single time. Explore dependable pressure washer setups, reels, and accessories to build the wash bay your garage has always deserved.