Wet Pressure Washer: Wet Sandblasting Without the Dust
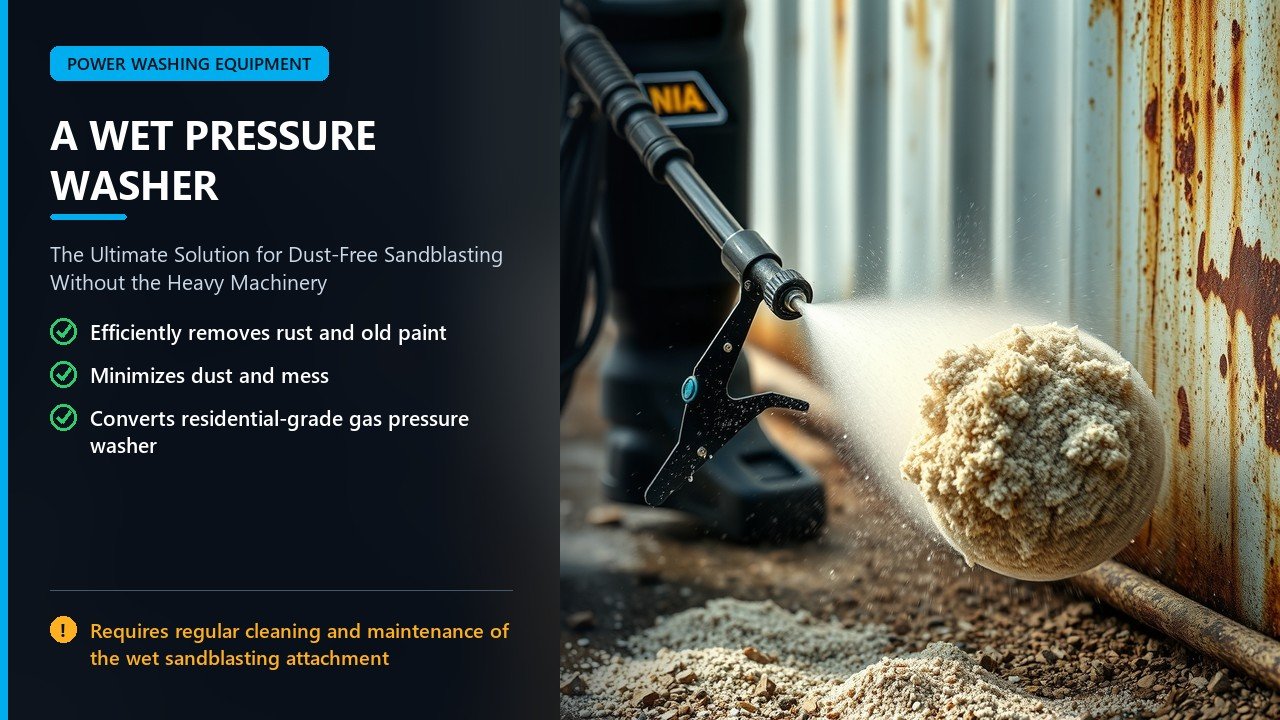
A “wet pressure washer” is not a different machine; it is your pressure washer wearing a wet sandblasting kit — an attachment that injects abrasive granulate into the water stream so the jet strips rust, old paint, and scale without kicking up the dust cloud of a conventional blast pot. Professionals have used water-injected blasting for decades, and the same idea now arrives as an affordable kit that converts a residential-grade gas pressure washer into a capable rust stripper. On fences, masonry, frames, and metal parts, the wet method cuts fast, keeps the surface cool, and leaves far less mess when the trigger is released.
This guide explains how the system works, what you need to build one, what you can clean safely with it, and how to get professional results the first time out — whether you are prepping a trailer to repaint or restoring a rusty gate for good.
Quick Note: A wet pressure washer is a pressure washer fitted with a wet sandblasting attachment and abrasive granulate. The water-and-sand mix strips rust and old coatings from durable surfaces with far less dust than dry blasting.
What Wet Blasting Actually Is
Sandblasting with compressed air throws abrasive at a surface so fast it abrades the top layer away. Wet blasting does the same job, but the abrasive rides inside the water stream that your pressure washer already produces. Instead of a bare nozzle, you fit a wet sandblasting gun or kit to the spray wand, dip the attachment’s pickup hose into a bucket of granulate, and pull the trigger. The venture inside the kit draws granulate into the water, and the mixture leaves the tip in a spray circle roughly three centimeters — about one and a quarter inches — across.
That small, concentrated pattern is deliberate: the narrow jet keeps the abrasive working in one spot rather than scattering it, which makes wet blasting ideal for uneven surfaces that a grinder cannot reach. Corrugated metal fences, dirty masonry, welds, and small durable metal parts are classic wet-blasting jobs because the stream follows the contours the way a rigid tool or spinning wheel cannot.
Because the abrasive is carried by water, it also cools the surface as it cuts. There are no hot spots, and the wet slurry traps most of the dust that dry blasting throws into the air. In many jurisdictions that dust difference is the single biggest reason to choose wet over dry.
What You Need to Build a Wet Pressure Washer Setup
You do not buy a “wet pressure washer” off the shelf; you convert the pressure washer you already have. The kit is three items, and every one matters.
| Component | What It Does | Key Requirement |
|---|---|---|
| Pressure washer | Supplies the high-pressure water that carries the abrasive | Roughly 3,000 PSI and up; gas units are the norm |
| Wet sandblasting kit | Replaces the nozzle; creates the vacuum that feeds granulate | Must fit your lance and gun; rated for your PSI and flow |
| Blasting granulate | The abrasive doing the cutting | Ready-mixed, correct grain size; never quartz sand |
Most kits draw granulate from an open bucket at your feet through a pickup hose, so the only setup is attaching the kit where the nozzle normally lives, filling a bucket, and dropping the pickup line in. Household and semi-pro machines in the 3,000 to 4,000 PSI class — the same class covered in our cold versus hot and drive guide — handle the job well, while light electric units often lack the flow to keep granulate moving steadily.
Choosing the Right Granulate
The abrasive is where wet blasting gets technical, because the wrong granulate damages work and health.
- Use a purpose-made granulate. Blasting granulates are produced to a controlled grain size, typically 0.2 to 1.0 millimeters for pressure washer kits, and are free of the impurities that make raw sand dangerous.
- Never use quartz sand. Silica dust from quartz sand causes silicosis, a serious and irreversible lung disease. Wet conditions help suppress dust, but quartz should still stay out of any blasting setup — it is banned for this use in many countries.
- Match grain to the job. Finer grain leaves a smoother finish for lighter cleaning; coarser grain cuts faster for heavy rust and paint, though it also textures the surface more aggressively.
- One mix per job keeps it simple. Ready-mixed granulates such as those made for pressure washer wet sandblasting kits are blend of grain and, in some cases, iron content, sized right out of the bag.
- Dispose of used granulate properly. Spent abrasive holds whatever you stripped — old paint, rust scale, dust — so collect it and dispose of it as the waste it has become.
- Buy grain in the right unit. Granulate is sold by weight; a bag sized for the job keeps a working supply fresh and avoids a heavy half-empty bin in the corner of the garage.
The manufacturers of the best-known wet sandblasting kits, such as the STIHL sandblasting approach used across the STIHL range, publish specific granulate recommendations for pressure washers, and their guide to wet sandblasting with a pressure washer is a good technical starting point if you are picking a kit.
How to Do a Wet Blasting Job
- Stage the work. Move the part to a designated blasting area; lay down a tarp or drop sheet to catch slurry, and keep bystanders and vehicles out of the line of rebound.
- Prepare the machine. Set up the pressure washer normally, then fit the wet sandblasting kit to the lance in place of the nozzle and drop the pickup hose into the granulate bucket.
- Purge with water first. Run water through with the pickup out of the bucket until the line is full and free of air pockets — air in the feed causes spitting and uneven blasting.
- Test on scrap. Start on a hidden corner or scrap piece to confirm the jet removes the coating without cutting the base material.
- Work methodically. Hold a steady standoff, match the effective spray circle of about three centimeters, and let the stream’s own motion carry material out of the way. Move in straight passes and overlaps.
- Flush before stopping. Lift the pickup out of the granulate, run the gun until the line runs clear water, then shut the machine down so residual abrasive never sits in the kit.
Technique is everything: too close and you gouge, too far and you only dampen the dirt. Experienced operators say the sweet spot is to let the abrasive visibly “bite” but not dimple the base surface, and to practice the distance on scrap before touching the real work.
Working order matters too. Start at the top of vertical work and move down, so stripped coating and slurry fall onto already blasted sections rather than freshly cleaned ones. On horizontal surfaces, sweep in overlapping lanes, the way you would with a surface cleaner on a driveway, and keep a wet film on the surface ahead of the jet so the abrasive does not pack or bounce off dry metal. If the material begins to show heat discoloration or the jet starts to wander out of the patched area, pause, re-check standoff, and stay methodical — steady rhythm beats brute force every time with wet blasting.
Wet Blasting Versus Dry Blasting
| Comparison | Wet (Pressure Washer) | Dry (Compressed Air) |
|---|---|---|
| Dust | Minimal | Heavy, requires containment |
| Equipment cost | Add a modest kit to your washer | Air compressor, blast pot, hoses |
| Surface heat | Stays cool | Can heat thin metal |
| Mess to clean up | Wet slurry | Dry abrasive |
| Best for | Rust, masonry, corrugated metal, small parts | Big flat panels, production shops, approved dust setups |
Dry blasting remains the heavy-duty industrial standard for large-scale stripping and for applications that demand a bone-dry surface afterward. Wet blasting wins for job sites where dust would be a problem — near homes, in enclosed areas, or around machinery that must not be sanded by airborne grit — and for anything where you want a more controlled, cooler, less aggressive cut on the first pass.
Surfaces a Wet Pressure Washer Handles Best
- Rusty metal. Fences, gates, trailers, and equipment frames where you want to reach a bare, paintable surface.
- Masonry. Dirty brick and block walls where a surface cleaner would not touch deep grime but a modest abrasive cut will.
- Corrugated and textured metal. The contours a wheel or grinder cannot follow are exactly what a narrow wet jet traces.
- Stone and concrete. Light stripping of old paint or heavy residue from hard, durable stone and concrete.
- Small parts. Brackets, wheels, and fittings done individually rather than in a big blast booth.
- Fleet and trailer frames. Undercarriages and frames that a brush cannot reach and dry blasting would dust across the whole yard.
- Welds and joints. Rust, scale, and discoloration around welds lift cleanly because the narrow jet follows the seam.
Delicate work and soft materials are out: thin sheet metal, softwood, trim, glass, and painted surfaces that you want to keep are all vulnerable to abrasive bite. When in doubt, test on a hidden area first — the same habit that protects a driveway when you switch to a surface cleaner, as described in our surface cleaner guide, applies twice over when abrasive is involved.
Safety and Cleanup
Safety is where wet blasting differs most from ordinary pressure washing, because you are throwing grit.
- Protect eyes and skin. Safety glasses or a full face shield, long sleeves, and gloves are mandatory; the rebound spray contains abrasive and stripped coating, not just water.
- Keep the body clear. Never position any part of yourself in front of the nozzle, and be aware that the stream can cut through rubber gloves and clothing at close range.
- Ventilate enclosed work. Wet blasting suppresses dust but does not eliminate it entirely; work in ventilated areas and consider respiratory protection for prolonged jobs.
- Control the rebound. Direct the work so slurry lands on your drop sheet, and keep others out of the spray path.
- Collect waste. Spend abrasive and stripped material go into a sealed container and are disposed of as coating waste, not as ordinary trash.
- Never run the pump dry. As with any pressure washer job, ensure water flows before starting — our pump protection guide covers keeping the pump alive.
Choosing a Wet Sandblasting Kit
Not every “wet sandblasting” gadget attaches the same way or suits the same machine, so a little reading before you buy saves a lot of frustration. The kit’s connection must match your gun and lance; most consumer wands use a 1/4-inch quick connect, and the kit should click straight on like any other nozzle. Check the rated pressure and flow range and confirm your machine sits inside it — a kit rated for 5,000 PSI at 8 GPM will be clumsy on a 1.6 GPM electric unit, and a light kit can be overwhelmed by a 4,000 PSI rig.
- Match to your PSI and GPM. The kit’s spec sheet states the operating range. Combining it with your machine’s real numbers — the ones explained in our 3200 PSI machine guide and bigger rig guides — tells you instantly if it will perform.
- Pick a controlled grain. Kits are sold with a matching granulate recommendation; buying the pair keeps grain size correct for the venturi.
- Prefer metal internals. Abrasive wears plastic feed valves quickly; brass or stainless fittings last far longer on a working kit.
- Check that parts are available. Feed tubes, pickup hoses, and valve spares should be easy to source; a disposable one-season kit is a false economy.
- Read the manual before the first pull. Every kit primes, purges, and flushes slightly differently, and the manufacturer’s sequence prevents jams.
If you are assembling a kit for a machine you already own, run through the pressure and flow first — most wet blasting kits are designed for gas machines starting around 3,000 PSI, which is precisely the class covered by our Honda-powered 4,000 PSI rig guide and the 4000 PSI 4 GPM benchmark article.
Common Wet Blasting Jobs and Settings
Practical operators match pressure, grain, and standoff to the specific job. Here is a rough reference table based on the guidance manufacturers publish for the pressure-washer approach to wet sandblasting.
| Job | Granulate Grain | Pressure Bias | Tips |
|---|---|---|---|
| Rust from a fence or gate | Medium | Run mid-range and work the contours | Overlap passes so no flash rust is missed |
| Old paint on masonry | Coarse | Full power in short sweeps | Stop at the coating line; brick needs care |
| Light grime from stone | Fine | Low to mid pressure | A gentle pass first; increase only if needed |
| Small metal parts | Fine to medium | Low and close | Hold the part or stage it so slurry falls away |
| Corrugated sheet metal | Medium | Mid to high | Let the jet follow ridges; do not force flat |
Whatever the job, the grading habit is the same: start gentle, check the result, then step up. Abrasive cut is cumulative — a surface under moderate output for the whole job cuts deeper than it looks at the start, so check corners early rather than discovering gouges at the end.
Renting Versus Buying a Wet Blasting Setup
A brand-new wet pressure washer kit is affordable next to the compressed-air alternative, but for a single project the right number is still “rent.” Sandblasting equipment rental, which often includes a compressor unit and blast pot for big surfaces, suits one-off jobs; the pressure washer wet kit is cheap enough that owners who will do rust work twice a year usually buy.
- Own if you strike soon again. Kit plus granulate runs far less than a dry blast setup, and it converts a machine you already use for flatwork and fleet washing.
- Rent for one grudge job. If you need to strip a single trailer or one wall, renting the whole blasting package avoids buying a granulate supply that sits for years.
- Consider granulate storage. Ready-mixed granulate keeps well if sealed dry, but a big bag is heavy to store; buy the size that matches the job.
- Budget the consumables. Granulate, drop sheets, PPE, and waste disposal are genuine costs and belong in the quote or the home budget before you start.
The real question is whether wet blasting suits the work at all. For automotive and restoration use, wet blasting’s cooler, less aggressive first pass is often exactly what a hobbyist wants on sheet metal and engine parts — where a dry blast booth would remove too much, wet lets you feather out rust with control. That control is also the argument for renting once to learn the technique before you invest in a kit and a machine pairing of your own.
Caring for the Machine After Wet Blasting
Abrasive is hard on equipment, so the post-job routine matters.
- Flush the kit. Run clear water through the gun and attachment after every job, exactly as the manufacturer instructs, so granulate never dries inside the valve or feed lines.
- Rinse the lance and fittings. Abrasive grains lodge in threads and quick connects; rinse them and re-oil where the manual asks.
- Clean the gun trigger and seals. Grit is the enemy of O-rings; inspect and replace worn seals before they leak. Our trigger gun guide shows how to service them.
- Wash the machine. A rinse of the frame keeps abrasive and stripped dust from rusting or jamming moving parts.
- Remove the kit between jobs. Take the attachment off and store it dry, so the lance and gun return to plain nozzles for everyday cleaning with no abrasive left anywhere in the line.
- Drain and store. Freeze protection and clean storage keep the machine ready for the next conversion — blasting one week, flatwork the next.
Troubleshooting Your Wet Blasting Setup
When wet blasting misbehaves, the failure is almost always in the feed, the spacing, or the grain — rarely in the pressure washer itself.
| Problem | Likely Cause | Fix |
|---|---|---|
| Sputtering or spitting stream | Air in the pickup line or empty bucket | Purge with water before starting; keep granulate topped up |
| No abrasive coming through | Clogged pickup hose or wrong grain | Clear the feed line; use the kit’s recommended granulate |
| Very little cutting | Standoff too far or grain too fine | Move in; step up grain size for the surface |
| Gouging the surface | Too close, too powerful, or grain too coarse | Move off, reduce pressure, or use finer grain |
| Jet wanders and misses contours | Working too fast or angle steeper than the jet | Slow down; let the jet ride the profile |
Two habits prevent most of these. First, test on scrap at the start of every job to set the pressure and standoff for that surface and that grain. Second, keep the pickup line short and clean, the bucket steady, and the machine fed with steady water — a pressure washer starved of supply will not pull granulate reliably. The same supply fundamentals that keep a plain washer strong apply with double force once abrasives are in play, and day one with any new kit should include a full dry run with plain water so the flow, the purge step, and the pickup draw are all confirmed before any abrasive enters the line.
Frequently Asked Questions
Can I wet blast with an electric pressure washer? Small electric units can carry a light kit for small parts at low pressure, but steady granulate delivery needs real flow. If your electric machine is 1.6 GPM or under, expect disappointing results and better returns from a gas host in the 3,000 PSI class.
Is a wet pressure washer the same as a pressure washer? It is a pressure washer doing wet sandblasting: a standard machine with a wet blasting kit and granulate fitted in place of the nozzle, producing a water-and-abrasive stream that strips rust and coatings.
Can any pressure washer do wet blasting? Most gas machines from about 3,000 PSI up have the flow to do it well. Light electric units often lack the power to keep granulate moving steadily through the kit.
Why is wet blasting less dusty? Because the abrasive travels inside the water stream and the slurry packs the material down. It is still background dusty, so contain and ventilate — but the difference versus dry blasting is dramatic.
How big a pressure washer do I need for wet blasting? Gas machines from about 3,000 PSI and 2.5 GPM up handle the standard kits; bigger flow makes the abrasive delivery steadier. A 4,000 PSI 4 GPM class machine is an ideal wet blasting host.
Can wet blasting remove paint from a car body? It can strip paint and rust from metal, but car panels are thin, so it takes a fine grain, low pressure, and a steady hand. Practice on scrap first, and consider whether the classic dry-blast shop is better for a full shell.
How long does a wet blasting job take? The jet works a small circle, so coverage is slower than a wide surface cleaner. A fence or gate takes length proportional to rust; expect to spend comparable time to a very thorough hand sanding, with a better finish on complex shapes.
Does wet blasting cause flash rust? On bare steel, dampness can promote flash rust before you prime. Have your coating ready, dry the surface quickly after the job, or work in sections on large panels.
How much granulate do I need for a job? Granulate use scales with the surface area and the depth of the coating. A bucket of ready-mixed granulate handles a fence or a gate; a whole wall or trailer means a larger supply. Budget for spent abrasive as waste, too.
Final Thoughts
A wet pressure washer is one machine doing double duty: the same rig that cleans driveways and fleets can strip rust from a fence, old paint from a wall, and corrosion from engine parts — with none of the dust a dry blast booth throws around. The setup cost is modest, the granulate is cheap, and the technique is learnable in an hour on scrap.
The rules that keep it safe and economical are few but firm: use purpose-made granulate and never quartz, protect your eyes and lungs, flush the kit with clear water after every job, and start gentle before leaning on the pressure. Follow those and a wet sandblasting kit turns the most useful tool in the shed into something even more capable — a rust-stripping workhorse that earns its place alongside the surface cleaner and the turbo nozzle in any serious pressure washing arsenal.
Whether your goal is a rust-free fence, a clean masonry wall, or restored metal parts, the wet pressure washer approach delivers a controlled, low-dust cut at a fraction of the cost of a compressed-air blast room. Start with a kit matched to your machine, a bag of proper granulate, and one afternoon on scrap, and you will know quickly whether wet blasting belongs in your routine for good. Owners who already run a gas pressure washer for flatwork and driveways will find the conversion costs little more than a good nozzle set — and returns a far wider range of services from the same machine.