A cluttered garage corner full of tangled hose, a pressure washer perched on a shelf, and a spray gun hanging from a nail by its handle. That was the state of Daniel’s setup until he spent one weekend mounting everything to the wall. The difference was immediate and almost comical. His pressure washer went from a thing he had to untangle and drag out to a station he could simply walk up to, plug in, and use. The wall mount did not add any power to his machine, but it transformed how easy the machine was to live with.
A power washer wall mount is really a system, not a single product. It can mean a purpose-built wall-mounted pressure washer, a wall-mounted hose reel, or a mounting bracket that holds an ordinary machine off the floor. Done well, a wall-mount setup turns a cluttered corner into an organized cleaning station with everything within reach. Done poorly, it puts a heavy, vibrating machine on a wall it was never meant to carry. Understanding the parts, the wall, and the power and water requirements is what makes the difference.
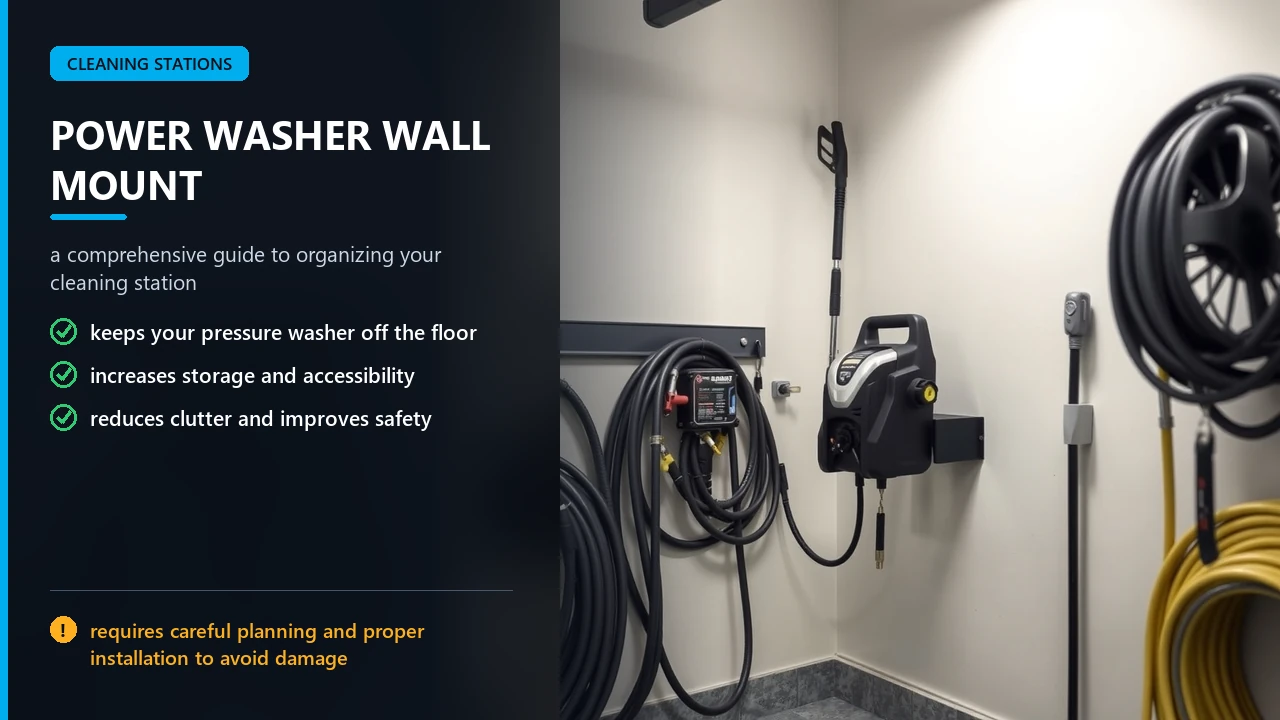
What Wall Mounting Actually Involves
People searching for a “power washer wall mount” usually want one of three things, and it helps to separate them before you shop.
The first is a wall-mounted pressure washer, a machine designed to hang on the wall, often with a built-in hose reel and an auto-retract feature. These units are purpose-built for garage and detail-bay use and mount directly to the wall with an included base plate. The second is a wall-mounted hose reel, a reel you attach to the wall so the high-pressure hose stays organized and ready, which many owners pair with a floor or shelf-mounted machine. The third is a bracket or shelf kit that lifts an ordinary pressure washer off the floor and onto the wall for storage and access.
Most complete setups combine more than one of these. A typical garage station has the machine on a bracket or shelf, a wall-mounted reel beside it, whip hoses connecting the two, and a short inlet hose running to a nearby spigot. The result is a compact, vertical setup that frees the floor and keeps every part where you can reach it.
Why Mount Your Pressure Washer
The appeal of wall mounting goes beyond tidiness, though tidiness is a real benefit.
First, it protects the machine. A pressure washer left on the floor is prone to being kicked, bumped, and soaked by puddles, and dirt and water find their way into motors and pumps. Raising it off the floor keeps it cleaner and drier, which extends its life.
Second, it improves access and speed. Everything is at working height, so you spend less time bending down, untangling hose, and dragging the machine across the garage floor. That matters most for detailers and frequent users who clean again and again.
Third, it saves space and reduces clutter. A wall-mounted station turns a jumble of equipment into a single organized footprint, and the hose reel alone eliminates the endless loop of hose that plagues a loose setup.
Wall-Mounted Unit vs Mounting Your Own
You can buy a wall-mounted unit or adapt a machine you already own. Each approach suits different users.
| Approach | Best For | Considerations |
|---|---|---|
| Purpose-built wall unit | Detail shops, frequent users | Integrated reel, clean look, higher cost |
| Bracket or shelf kit | Using an existing machine | Cheaper, flexible, needs sturdy wall |
| Wall-mounted hose reel | Any setup | Biggest convenience gain, easy add-on |
A purpose-built wall unit is the cleanest solution because everything is designed to hang together, often with an auto-retracting reel and a compact footprint. It costs more, but it looks and performs like a professional station. A bracket or shelf kit lets you keep a machine you already own, which is often more economical, but you must ensure the wall and the bracket can carry the machine’s weight and vibration. A wall-mounted hose reel is the easiest upgrade and delivers a surprising amount of the benefit on its own, since hose management is half the battle in any pressure washing setup.
Our guide to a pressure washer wall mounted hose reel that ends the tangle covers that single upgrade in depth, and the broader look at hose reels for pressure washers helps you match a reel to your machine.
Choosing the Mounting Surface
The wall itself decides how you mount the unit, so identify your wall type before you buy hardware.
Wood studs are the ideal surface. Locate two adjacent studs with a stud finder, then fasten the base plate with the provided lag screws into those studs. A plate spanning two studs distributes the load and holds securely against vibration.
Concrete or block walls require masonry anchors or expansion bolts. Drill the recommended hole depth and diameter, set the anchors, and tighten the base plate so it sits flush and level. Concrete holds tremendous weight when the anchors are installed correctly.
Drywall or weak surfaces should never carry a pressure washer directly. If your only option is a drywall wall with widely spaced studs, attach a sturdy plywood backing board across the studs, then mount the base plate to the board. The board spreads the load and gives you solid material to fasten into.
Whichever surface you use, confirm the base plate is level and fully tightened before you hang the machine. A level mount keeps the reel working smoothly and prevents the vibration that loosens fasteners over time.
Power and Water Requirements
A wall-mount station needs reliable power and a good water supply right where you install it, so plan those before you drill any holes.
On the electrical side, run a dedicated circuit for the pressure washer, typically 15 amps minimum with 20 amps recommended for higher-draw machines. A shared circuit invites tripped breakers every time another device turns on. Critically, the outlet must have ground fault circuit interrupter (GFCI) protection, because water and electricity in the same wet area is a serious hazard. A GFCI cuts power instantly if current leaks to ground, which is exactly the protection you want around a pressure washer. If you are not confident running wiring, hire an electrician; this is one area where doing it right is non-negotiable.
On the water side, a half-inch line is the practical minimum, and three-quarter inch is better for a high-flow machine. Confirm your supply can deliver the flow your washer needs before you commit to the location. If water pressure is marginal, the machine will surge and lose performance no matter how well it is mounted, so testing the supply first saves frustration later. The Occupational Safety and Health Administration maintains guidance on electrical safety and GFCI use that is worth a look if you are planning the power side yourself.
Where to Mount It
Placement is simple but easy to get wrong. Mount the base plate at roughly 24 to 32 inches above the floor, a height that keeps the machine off the ground while leaving the reel and controls at a comfortable working height. A reel that is too high strains the hose and makes retraction awkward; too low and you bend and fumble.
Choose a location near both a power outlet and a water source so you are not running long hoses and cords across the floor, where they become trip hazards. Leave clearance behind and beside the machine for airflow and for the hose to travel without binding. If the machine will stay outdoors or in an unheated space, plan for weather protection and winterization from the start, because freezing water destroys pumps and reels.
Installation Steps at a Glance
The process is straightforward once the location and hardware are decided.
Start by selecting the location and confirming the wall type and stud locations. Attach the mounting template or trace the base plate, marking all mounting holes. Drill the correct size holes for your wall and anchors, using a masonry bit for concrete and a wood bit for studs. Secure the base plate and check that it is level and tight. For a machine on a bracket or shelf, place the unit and fasten it with the recommended bolts. Connect the inlet hose from the water supply to the machine, and the high-pressure whip hose from the machine outlet to the reel. Install the high-pressure hose on the reel, connect the gun and wand, then open the water and release the trigger to purge air before starting. Finally, plug into the GFCI outlet and test.
Take your time on the connections and use thread tape or the manufacturer’s seals on threaded fittings to prevent leaks. Hand-tighten where the manual says to hand-tighten, since overtightening plastic or brass threads damages them and creates leaks that are hard to fix. When everything is connected, run the machine and check every joint for drips before you call the job done.
Pairing With a Hose Reel
A wall-mounted reel is the part that most changes daily usability, so it is worth choosing carefully.
Reels come in manual crank and powered versions, and in fixed or swivel designs. A manual crank reel is robust and simple, while a powered reel winds the hose for you and is a favorite in busy detail bays. Swivel models help the hose follow you without kinking, which matters when you walk around a vehicle. Match the reel’s hose capacity and pressure rating to your setup, and choose a reel built for the hose diameter you run. Our guide on a pressure washer hose reel wall mount that keeps hose ready walks through the options, and for a premium powered setup, the look at an electric hose reel pressure washer with powered winding shows what is available.
Position the reel so the hose pays out smoothly toward where you clean, and leave clearance so it does not rub the wall or bind against the machine. A little planning here prevents the kinks and wear that shorten hose life. If you want manufacturer guidance for a specific product, install manuals from makers such as Giraffe Tools and Active Products show the exact drilling depths, anchor types, and mounting heights their systems require. Following the maker’s template and torque specs is the surest way to a mount that stays solid and level.
| Reel Type | How It Works | Best For |
|---|---|---|
| Manual crank | You wind the hose by hand | Home garages, simplicity, low cost |
| Auto-retract spring | Spring rewinds the hose | Compact setups, quick pickups |
| Powered electric | Motor winds the hose | Busy detail shops, frequent use |
| Swivel mount | Reel pivots to follow the hose | Tight spaces, vehicles on all sides |
Building a Complete Wall-Mount Station
Once you understand the pieces, assembling a full station becomes straightforward. The goal is a self-contained setup where the machine, reel, and connections all live on the wall within easy reach of power and water.
A typical parts list includes the pressure washer itself, a mounting bracket or shelf, a wall-mounted hose reel, a short jumper hose from the machine outlet to the reel, a flexible inlet hose from the water source to the machine, quality quick-connects, and the fasteners and anchors suited to your wall. Add a nozzle holder and a small shelf for accessories and the station is complete.
| Component | Purpose | Tips |
|---|---|---|
| Mounting bracket or shelf | Holds the machine off the floor | Rated for the machine’s weight |
| Wall hose reel | Stores and pays out the hose | Match pressure and hose size |
| Jumper hose | Links machine outlet to reel inlet | Keep it short and rated for the pressure |
| Inlet hose | Feeds water to the machine | Flexible, so it absorbs vibration |
| Quick-connects | Fast, tool-free hose changes | Stainless steel resists corrosion |
Use a flexible inlet hose rather than rigid plumbing right up to the machine. A pressure washer shifts slightly under load, and a flexible line absorbs that movement while making future servicing far easier. On the outlet side, keep the jumper hose short and route it so it does not cross where you walk or reach the reel.
Quick-connects are worth the small investment because they make swapping hoses, guns, and nozzles fast and tool-free. Choose stainless fittings in a wet environment, keep the O-rings clean and lubricated, and treat the connections as the most likely leak points. A quality set of quick-connects quietly removes the friction from every single use of the station.
What a Wall-Mount Setup Costs
Costs vary widely depending on whether you adapt a machine you own or build a full station from scratch, but the ranges are easy to understand.
If you mount an existing pressure washer, your main costs are the bracket or shelf and the hose reel. That is the most economical path and often the best value, since the machine is already paid for. Adding a quality wall reel and a sturdy bracket is a modest investment that immediately improves daily use.
If you buy a purpose-built wall-mounted unit, expect to pay more, but you gain an integrated, compact design that often includes an auto-retracting reel, premium components, and a cleaner look. For a detail shop or a serious enthusiast who uses the setup constantly, that convenience can justify the price. Factor in the accessory side too: quick-connects, a jumper hose, an inlet hose, and a nozzle holder add a little more, but they complete the station and prevent leaks and frustration down the road. If you need professional plumbing or electrical work, budget for hiring a licensed tradesperson, because that cost buys safety and reliability that a rushed DIY job cannot match.
The smartest approach is to start with the parts that deliver the most benefit per dollar. A wall-mounted hose reel and a solid bracket often transform a loose machine into an organized station for a fraction of the cost of a full wall unit, and you can always upgrade the machine later. Think of the wall mount as the foundation, and the machine as a part you can improve over time.
Protecting the Setup
A wall-mounted station still needs seasonal care, and the biggest risk is freezing.
If your setup lives in an unheated garage or outdoors, winterize it before the first freeze by draining the pump, hoses, and reel, and adding protection if the manual recommends it. Water left inside a pump or reel can freeze, expand, and crack the housing, turning a weekend project into a replacement purchase. Cover the machine when it is not in use if it is exposed to dust or weather, and check the inlet filter monthly to keep grit out of the pump.
A wall-mount setup rewards a few minutes of maintenance with years of convenient service. Draining it properly at the end of the season is the single most important habit, and it is the one most often skipped.
Common Mistakes to Avoid
A few predictable errors undermine wall-mount setups.
Mounting to drywall alone. This is the most dangerous mistake. Use studs, masonry, or a backing board, always.
Ignoring the electrical requirements. A shared circuit and a missing GFCI create both nuisance breaker trips and a genuine shock hazard around water.
Mounting too high or too low. The 24 to 32 inch range keeps the machine and reel working comfortably. Too high strains hoses; too low is awkward to use.
Undersizing the water line. A supply that cannot keep up starves the pump and causes surging and pressure loss no matter how good the machine.
Skipping winterization. Trapped water destroys pumps and reels in a single freeze. Drain the system every season.
Frequently Asked Questions
Can I wall mount any pressure washer? Many ordinary pressure washers can be mounted with a bracket or shelf kit if the wall is sturdy and the bracket is rated for the machine’s weight. Some machines are purpose-built for wall mounting, which is the cleanest option.
Can I mount a pressure washer on drywall? No. Drywall alone cannot hold the weight and vibration. Mount into wall studs, masonry, or a plywood backing board fastened to the studs.
What height should a wall-mounted pressure washer be? Mount it about 24 to 32 inches above the floor, which keeps it off the ground while placing the reel and controls at a comfortable working height.
What electrical setup does a wall-mount pressure washer need? Use a dedicated circuit, typically 15 amps minimum and 20 amps recommended, with ground fault circuit interrupter protection. Never rely on a shared, unprotected outlet in a wet area.
Do I need a special water line? A half-inch line is the minimum and three-quarter inch is better for high-flow machines. Confirm your supply can deliver the flow your washer requires.
Can a wall-mounted pressure washer stay outside in winter? Only if it is thoroughly winterized and protected. Water left in the pump or reel can freeze and crack the components, so drain the system before freezing temperatures arrive.
How much weight can a wall hold? A wall stud or a proper masonry anchor can hold far more than a typical pressure washer, but the key is fastening into solid material with hardware rated for the load. Distribute the weight across multiple fasteners and never mount into drywall alone.
Should I mount the machine or the reel first? Lay out both locations before drilling anything. Center the reel relative to where you clean, then set the machine so the jumper hose reaches the reel without strain. Marking both templates first avoids drilling holes you later regret.
Do wall-mounted washers lose power compared to portable ones? No. Mounting changes where the machine sits, not what it can do. As long as the water supply and circuit meet its requirements, a wall-mounted machine performs exactly like the same machine on the ground.
Final Thoughts
A power washer wall mount turns a scattered collection of equipment into a clean, efficient station. Whether you install a purpose-built wall unit, mount your existing machine on a bracket, or simply add a wall-mounted hose reel, the payoff is the same: less clutter, faster setup, and a machine that stays clean and ready to use. The work is modest, and the improvement in how you clean is immediate.
Anchor into something solid, respect the power and water requirements, mount at a comfortable height, and drain everything before winter. Do those things and your wall-mount setup will serve you for years, turning a corner of the garage into the most convenient pressure washing station you have ever owned. For a broad look at the reels that complete such a setup, our guide on the best pressure washer hose reels that last for years is a helpful companion read.