Wall Mount Power Washer: Build a Fixed Wash Station That Lasts
A wall mount power washer turns a loose, awkward machine into a permanent cleaning station bolted to the wall of your garage, shop, or wash bay. No more dragging a heavy unit across the floor, tripping over coiled hoses, or hunting for a place to store everything. Done right, the machine hangs at working height, the hose reel sits beside it, and the whole setup is ready the moment you flip a switch. Done wrong, it falls off the wall or floods the corner. This guide covers what a wall mount power washer is, why it beats a floor machine, how to install one safely, and how to plumb and arrange it so the station actually works. It is written for the practical owner who wants the benefits without the mistakes.
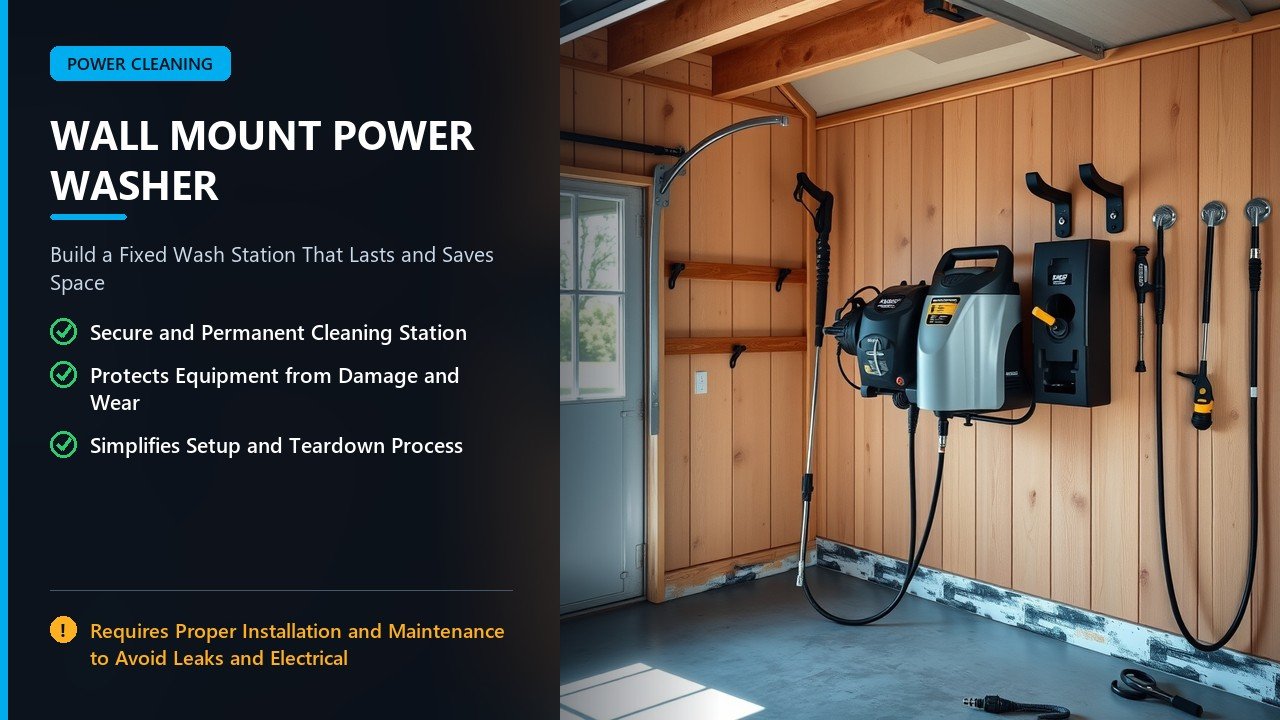
What a Wall Mount Power Washer Is
A wall mount power washer is a pressure washer designed or adapted to be fastened to a wall rather than rolled on wheels. Some models are purpose-built for this, with a steel frame and a dedicated bracket, while others are standard machines that accept an optional wall-mount kit. The idea is simple: get the pump, motor, and controls off the floor and up where they are protected, out of the way, and always plumbed and ready.
Manufacturers build these machines for garages, workshops, car wash bays, and utility rooms, where floor space is precious and a permanent cleaning position makes sense. The machine typically mounts at waist to chest height, with a hose reel nearby and a wand stored on a hook. Because it stays connected to power and water, it removes the setup and teardown ritual that discourages people from cleaning in the first place. Our overview of a wall-mounted cleaning station covers the concept.
Why Mount It Instead of Rolling It
The case for a wall mount power washer comes down to space, protection, and convenience. A floor machine occupies a footprint that is always in the way, whereas a mounted unit frees that space entirely. On the wall, the machine sits above splash and backspray, away from puddles and corrosive chemicals that shorten equipment life. And because it stays hooked up, using it takes seconds instead of minutes.
There is also an ergonomic angle. Lifting a heavy pressure washer in and out of storage, coiling hoses, and bending to reach controls wears you down and leads to skipped jobs. A wall mount keeps everything at a comfortable height, with the wand on a hook and the reel within reach. For anyone who cleans vehicles, equipment, or a shop floor regularly, those small gains add up to a lot more cleaning done. Our piece on turning a wall into a space-saving fixed wash station makes the case.
Purpose-Built Units vs Wall-Mount Kits
There are two routes to a wall mount power washer. The first is a purpose-built machine, designed from the start for wall mounting with a robust frame and a factory bracket. The second is a standard washer paired with an aftermarket or optional wall-mount bracket. Each has merits, and the right choice depends on how permanent and how heavy-duty your station needs to be.
Purpose-built units tend to be the tidier solution, with the frame, bracket, and controls engineered together so the machine hangs correctly and looks intentional. Wall-mount kits let you reuse a washer you already own or choose a machine based on performance rather than mounting. The critical question is whether the bracket is rated for the weight and whether your wall can carry it. Our guide to choosing a wall-mount washer helps weigh the options.
Indoor vs Outdoor Mounting
Where you mount the machine shapes every other decision. An indoor mount, in a garage or utility room, keeps the unit dry and protected and is the most common choice. An outdoor mount, on an exterior wall or in a carport, exposes the machine to weather and requires more care in choosing a weather-resistant unit and protecting it from freezing.
Indoor mounting also changes the plumbing and drainage picture, because water will be used near the wall and needs somewhere to go. A wash bay with a floor drain is ideal; a garage without one needs a plan to manage runoff. Outdoor mounting needs freeze protection even more urgently, since a pump full of water can crack in a cold snap. Decide indoor or outdoor first, then let that decision guide the unit, the mounting, and the plumbing. Our article on an electric wall-mounted washer explores the always-ready setup.
Checking the Wall and Finding Studs
The single most important step in installing a wall mount power washer is mounting it to structure, not just the surface. A machine full of water and under load is heavier than it looks, and a bracket held only by drywall anchors will eventually fail. You must fasten into wall studs, and for heavier machines, into blocking or a proper backing plate.
Studs are typically spaced 16 inches apart, and you must locate them before drilling, using a stud finder or the knock method. Drill into the center of each stud, never its edge, and confirm the studs are at least 2 by 4 inches. If the machine’s bracket spans two studs, you are in good shape; if it does not line up, add a horizontal backing board fastened across the studs and mount the bracket to that. Instructions for wall brackets are consistent on this point: overlapping at least two studs gives a safe, stable mount. Our guide to a pressure washer mount explains the structural thinking.
Never do this: Do not hang a pressure washer on drywall anchors alone. Fasten into studs or add a backing board across the studs. For brick, drill into the brick, never the mortar; avoid concrete block, which can crumble and pull out.
Mounting Height and Position
Mount the machine at a height that puts the controls and connections at a comfortable reach, generally waist to chest height, roughly 40 to 48 inches from the floor. Too low and you are stooping to start it; too high and reaching the connections and lifting the wand becomes awkward. Think about the hose run too, and mount the machine where the hose can reach the work area without dragging through the whole garage.
Position the machine so its water inlet and outlet face where the plumbing and hose run, avoiding sharp bends and strain on fittings. Keep it clear of the spray zone so backspray is not hitting the machine, and if possible mount it high enough that the unit sits above puddle level. A remote on-off switch, common on professional wall units, lets you keep the machine out of the splash area while controlling it from where you work. Our review of the best wall-mounted washer for a tidy setup expands on placement.
Plumbing the Water Supply
A permanent station deserves permanent plumbing. Rather than snaking a garden hose across the floor, run a proper supply line from a nearby tap or a dedicated valve to the machine’s inlet, using a shutoff close by so the station can be isolated. Many owners plumb in a Y-valve or a manifold to feed both the pressure washer and a rinse hose, making the station versatile.
Filtered or softened water is a worthwhile upgrade, because hard water leaves mineral spots and deposits that clog nozzles and scale the pump over time. A deionizing or filtration setup is common in detailing garages, delivering spot-free rinsing. Whichever you choose, use fittings rated for the supply side, keep the run short and direct, and include a shutoff and a drain point so the line can be emptied before winter. Our guide to building a clean, ready-to-use wash station covers the plumbing layout.
Power and Electrical Safety
Wall-mount electric washers typically run on 120 volt circuits, with some larger units needing 240 volts. Before installing, confirm your circuit can carry the load; a machine drawing 13 to 20 amps on a shared circuit may trip breakers or starve the motor. A dedicated circuit is the clean solution, especially if the station will run anything else at the same time.
Because the machine is mounted in a wet environment, electrical safety is paramount. Use a ground-fault circuit interrupter outlet or breaker, keep connections away from splash, and route cords so they cannot sit in water. This is another reason a remote switch or a wall-mounted control is attractive: it keeps the live connection away from the wet work zone. Never install the machine where it can be sprayed directly, and always respect the manufacturer’s electrical requirements. Our article on installation and benefits reinforces these points.
The Hose Reel and Storage
No wall mount power washer station feels finished without a hose reel. Mounting a reel beside the machine keeps the high-pressure hose tidy, prevents the kinks and tangles that shorten hose life, and makes deployment a matter of pulling and releasing. Match the reel to your hose diameter and pressure rating, and mount it solidly to studs just like the machine.
Add a wand hook and a spot for nozzles and detergent so the whole station is self-contained. Some setups use slatwall or a pegboard backing to organize accessories and keep everything at hand. The goal is a station where you grab, spray, and put back without a scavenger hunt. Our guide to hose reel types and mounting helps you pick the right one.
Models and Specifications to Compare
Wall mount machines range from light homeowner units to professional wash-bay equipment. A representative residential unit, the SIP Tempest PW420/150, delivers about 2,175 PSI at a 420 litre-per-hour flow rate from a 1.6 kW brushless induction motor on a 230 volt supply, with a detachable powder-coated bracket that also allows freestanding use on anti-vibration feet and a foam-grip handle. The SIP Tempest product page shows the adaptable bracket design.
At the professional end, Karcher’s HD wall-mounted line illustrates what a purpose-built unit offers. The HD 2.0/14 Ed runs 1.8 GPM at about 1,400 PSI from a quiet 1,725 RPM motor on 120 volts and 20 amps, weighs around 123 pounds, and accepts water up to 180 degrees Fahrenheit. It features a remote on-off switch with a 10-foot cord, keeping the machine away from backspray, and a triplex crankcase pump with a long warranty. The Karcher HD data sheet details the specification and the optional wall bracket. Our commercial wall-mounted guide covers this class.
| Class | Typical Spec | Best For |
|---|---|---|
| Home wall-mountable | ~2,000 PSI, 1.6 kW, 230 V | Garage, patio, cars, bikes |
| Light professional | ~1,400 PSI, 2 HP, 120 V, 20 A | Shop, utility room, in-shop cleaning |
| Commercial wash bay | Higher flow, 240 V, hot water option | Fleet, car wash, industrial |
Winterizing a Wall Mount Power Washer
A permanently plumbed station needs a winter routine, because water left in the pump, plumbing, and machine is the fastest way to crack a manifold. If the space freezes, drain the supply line, blow out or drain the machine, and run a pump protector fluid through the pump before storage to displace water and lubricate the internals. If you live where hard freezes are rare and the space stays above freezing, a pump protector is still cheap insurance.
Consider isolating valves and drain points on the plumbing so you can empty the lines without dismantling the station. A shutoff at the wall and a low drain make winterizing a five-minute job instead of a project. If the machine can be removed from its bracket, taking it indoors for the coldest months is another option. Our mounting comparison guide covers how each setup handles storage.
Ongoing Maintenance
A wall mount power washer needs the same care as any machine, just easier to reach. Check and change the pump oil on schedule, inspect the inlet filter for debris, and keep nozzles clear of scale. Because the machine is out in the open on a wall, watch for leaks and corrosion where it stays damp, and tighten fittings that vibrate loose. The hose reel deserves attention too, since a kinked or worn hose stresses the pump.
The beauty of a fixed station is that maintenance becomes routine rather than a chore you forget. Everything is visible and accessible, so small problems are spotted before they grow. Keep a spare O-ring, nozzle, and pump protector fluid on hand, and the station will run reliably for years. Our guides to reel maintenance and pump care round out the ownership picture.
Common Wall Mount Mistakes
Most wall mount failures come from a short list of install errors. Mounting into drywall without studs is the worst, and it is the cause of nearly every fallen-machine story. Skipping the load check on the wall, ignoring electrical requirements, and plumbing without a shutoff or drain all cause problems later. Poor placement that leaves the machine in the splash zone, or too high to reach comfortably, undermines the whole point.
Skipping winterization cracks pumps, and forgetting the hose reel leaves a tangle that stresses the machine. None of these mistakes is hard to avoid, but each one is easy to make in a rush. Plan the mount, check the structure, handle the electrics properly, plumb with isolation, and choose a sensible height. Do that, and the station delivers exactly the convenience you set out to gain. Our companion piece on wall-mounted electric washers is a useful reference.
Who a Wall Mount Power Washer Suits
A wall mount power washer is ideal if you have a dedicated space, a garage or shop wall you can bolt to, and a regular cleaning routine. Detailers, mechanics, farmers, and homeowners who wash cars and equipment frequently all benefit from the always-ready setup. It is also a strong fit for anyone short on floor space who still wants serious cleaning capability.
It is less suited to someone who needs portability, cleans in many locations, or has no structurally sound wall. In those cases, a wheeled machine or a skid setup makes more sense. The station shines when it stays put and gets used, so match the platform to how and where you actually work. Our wall, skid, or trailer comparison helps you decide.
Planning the Station Step by Step
Success starts with a plan before any hole is drilled. Follow this sequence.
- Choose the location, indoor or outdoor, with water, power, and drainage in mind.
- Pick the machine and confirm its weight and mounting bracket.
- Locate the studs and decide whether a backing board is needed.
- Plan the water supply, including a shutoff, filter if used, and a drain point.
- Plan the electrical supply, ideally a dedicated GFCI circuit.
- Mount the bracket and machine at a comfortable working height.
- Install the hose reel and storage beside the machine.
- Connect and leak-test the plumbing before first full-pressure use.
- Set up a winterization routine for the whole station.
Following this order prevents the common trap of mounting a machine before realizing the hose will not reach or the circuit will not carry it. A little forethought turns a weekend project into a station you will use for years. Our installation guide walks through the same steps in detail.
Water Supply and Drainage in Practice
Two practical questions decide how pleasant a wall mount power washer station is to use: where the water comes from and where it goes. On the supply side, a dedicated line with a shutoff is the goal, but many owners start with a quality garden hose run to a nearby tap and upgrade later. If you do run a hose, keep it short, avoid sharp bends, and protect it from being driven over, since a kinked or pinched supply line starves the pump and causes cavitation, the leading cause of pump wear.
On the drainage side, a wash bay with a floor drain is the dream setup, letting runoff leave cleanly. In a garage without a drain, plan a containment approach: a slight slope toward the door, a squeegee routine, or a containment mat. Standing water is a slip hazard and a corrosion risk for anything mounted low, so managing runoff protects both you and the equipment. A buying and setup guide is a useful cross-check when planning the station, and our article on wash station plumbing covers the layout.
Choosing Between Cold and Hot Water
Most wall mount power washers are cold water machines, which suits the majority of garage, shop, and vehicle cleaning. Some professional wall units, however, accept hot water, and a few are built to use it for grease and heavy soil. If your work involves oily engines, restaurant equipment, or industrial grime, a hot water capability is worth seeking out, because heat does much of the cleaning work that pressure alone struggles with.
Hot water also brings requirements: the machine must be rated for the temperature, the plumbing must handle it, and the electrical load is often higher. For a home garage washing cars and patios, cold water is perfectly adequate and far simpler. Match the machine to the dirt you actually face rather than buying hot water capability you will never use. Our commercial wash-bay guide explores the hot water end of the range.
Budgeting the Project
It helps to think of a wall mount power washer station as a small project with three cost buckets: the machine, the mounting and plumbing, and the accessories. The machine dominates the budget, ranging from a few hundred dollars for a home unit to several thousand for professional wash-bay equipment. Mounting hardware, a backing board, plumbing fittings, shutoffs, and an electrical outlet or GFCI make up the next slice. Then come the hose reel, hose, nozzles, and storage.
The trap is spending the whole budget on the machine and skimping on the mounting and plumbing, which are what make the station safe and pleasant. A strong machine on a weak mount is worthless, and beautiful plumbing without a good reel still leaves a tangle. Allocate for the whole system, and if the budget is tight, buy a solid mid-range machine and invest in doing the install properly. Our features and buying guide helps you prioritize.
Keeping the Station Safe
Safety on a wall mount station covers three areas: electrical, water, and mechanical. Electrically, use GFCI protection, keep outlets and connections out of splash, and never work on the station with wet hands or a wet floor contacting live parts. Water-borne safety means managing runoff to prevent slips, and mechanically, it means mounting to structure and checking fasteners periodically so nothing works loose under vibration.
Because the machine stays connected to power and water, it also needs a disciplined routine for leaving it safely: shut off the supply, depressurize the hose, and switch off the power when the station is not in use. Those habits prevent the minor mishaps, a burst hose or an energized puddle, that turn a convenience into a hazard. Our installation guide reinforces the safety basics.
Frequently Asked Questions
Can I wall mount any pressure washer?
Not any. The machine must have a mount rated for its weight, or accept a compatible bracket, and your wall must reach studs. Purpose-built units are easiest, but many standard washers work with a proper wall-mount kit and a backing board.
How high should a wall mount power washer be installed?
Waist to chest height, generally around 40 to 48 inches from the floor, puts the controls and connections within easy reach and keeps the machine above puddle level. Adjust to the height of the main user.
Do I need special plumbing for a wall mount washer?
A permanent supply line with a shutoff is ideal, and a drain point makes winterizing easy. Filtered or softened water prevents scale and spots. All supply-side fittings should be rated for the connection and kept short and direct.
What electrical supply does a wall-mounted washer need?
Most household units run on 120 volts, drawing 13 to 20 amps, while larger machines may need 240 volts. A dedicated GFCI circuit is the safest choice in a wet environment, and the machine should never sit in spray.
How do I stop a wall mount washer freezing in winter?
Drain the supply line and the machine, then run pump protector fluid through the pump to displace water and lubricate the internals. Isolation valves and a drain point make this a quick routine. Remove the unit indoors if the space freezes hard.
Is a wall mount power washer better than a portable one?
For a fixed location and regular use, yes, because it saves floor space, protects the machine, and stays ready to use. Portability is the advantage of a wheeled machine, so choose based on whether you clean in one place or many.
The Bottom Line
A wall mount power washer is a small project with a big payoff: a permanent, tidy, always-ready cleaning station that keeps your machine safe and your floor clear. The recipe is not complicated. Choose the right machine, mount it into studs at a sensible height, plumb it with a shutoff and a drain, power it on a dedicated circuit, and give it a hose reel and a winter routine. Avoid the drywall-anchor trap and the missing-drain mistake, and you will have a station that works for years. Mount the machine, plan the station, and the wall does the rest.