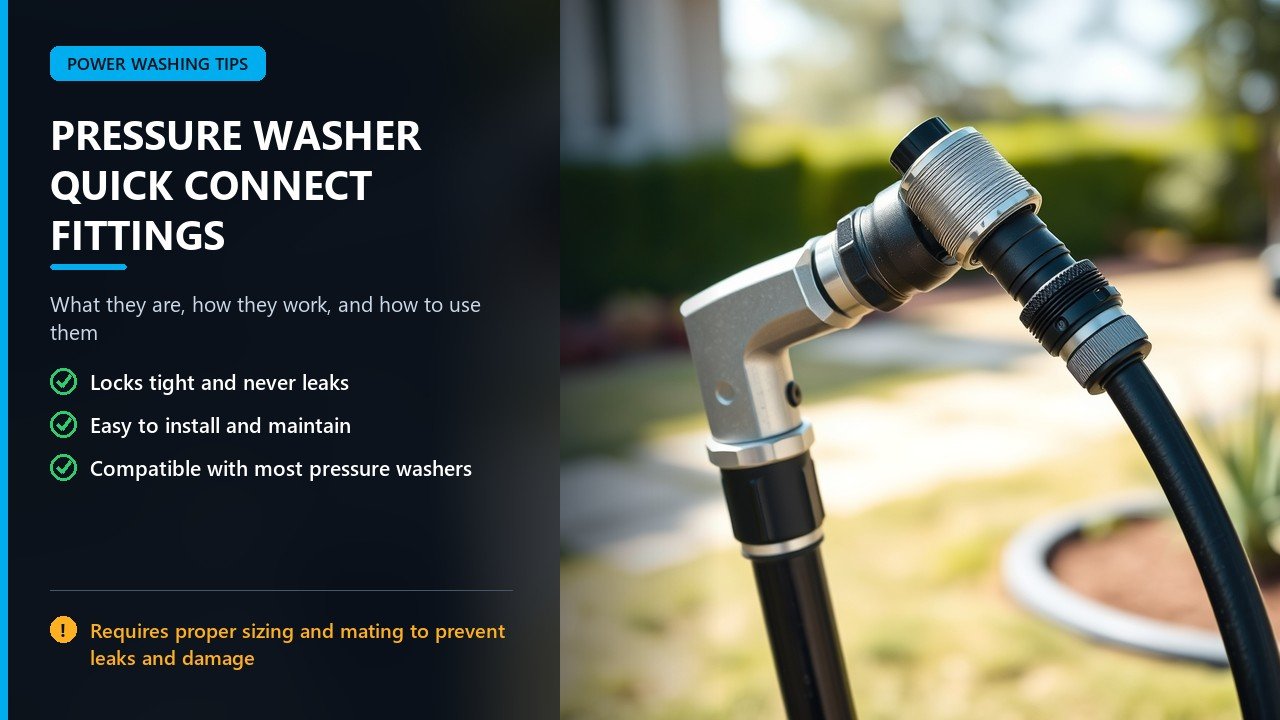
Pressure Washer Quick Connect Fittings That Lock Tight and Never Leak
The high-pressure hose reaches for the wand, the coupler slides home, and with a sharp click the connection is made. That satisfying click is the entire point of quick connect fittings, which are searched for under an endless set of spellings, including the famously misspelled “presser washer quick connect fittings,” and yet millions of homeowners still wrestle with the wrong sizes, dripping couplers, and popped connections. A quick connect system is the fastest upgrade in pressure washing, but only if you understand the two mating standards, the three common sizes, and the handful of reasons every fitting in your cabinet eventually leaks.
This guide sorts all of it out: what quick connect fittings are, which size your machine uses, how male and female ends pair up, why the connection leaks and how to fix it in minutes, how to buy the right kit without guessing at bushings, and the maintenance habits that keep every click snappy for years. Whether you own a Karcher, a Ryobi, a Simpson, or a pro belt-drive unit, the fitting logic is identical, and by the end you will install the correct coupler on the first try and never stare at a dripping joint again.
What Quick Connect Fittings Actually Do
A quick connect fitting is a two-piece coupling; one half, the plug, slides into the other half, the socket, and a spring-loaded collar locks them with a click. No tools, no threading, no wrenches. The plug usually carries a groove that the socket’s ball bearings snap into, which is why you hear the click and why the connection holds pressure instead of coming apart. Lift or push the collar, the bearings release, and the parts separate.
In a pressure washer system quick connects replace the threaded joints at the strategic spots: the end of the high-pressure hose, the base of the gun, the head of the wand, and the back of each spray tip. That lets you swap a wand, change a tip, or reach for a surface cleaner in seconds without chasing wrenches. The trade, and it is a fair one, is that a quick connect is only as good as its socket collar, its O-ring, and the groove on its plug, which is why worn parts leak and why fresh parts click like the day they were born.
The Two Standards That Trip Everyone Up
Two coupling families dominate residential and light-commercial pressure washing, and mixing them is the number one source of “the fitting doesn’t fit” frustration.
- M22 threads: a threaded, metric coupling (22 mm) used on many machines for the connection between pump, hose, and sometimes the gun base. You will see M22-14 (14 mm internal bore, male) and M22-15 (15 mm internal bore, female). These are not quick connects at all; they are the threading your hose screws onto.
- Quick connect (interchange) couplers: the push-on coupling used for wands, tips, and often at the gun. These are the click-and-go fittings and come in sizes like 1/4-inch and 3/8-inch with various flow ratings.
The classic mismatch: a user buys an “M22 quick connect” set, or tries to slide a 1/4-inch quick connect onto a 3/8-inch hose end, and spends an hour fighting it. The fix is to identify which side of your machine uses threads and which uses the click coupling before you buy anything. Our guide on standard quick connect sizes shows how to measure your fittings so you order the correct family the first time.
Sizes, Plugs, and Sockets: Reading the Specs
Quick connect sizes reference the coupling’s internal flow bore, not the outer dimension, and the most common residential size is 3/8-inch, with 1/4-inch common on smaller units and some machines mixing sizes at the tip end. When a listing says “3/8-inch quick connect,” it usually means a set that fits a 3/8-inch hose or matching plug, and it pairs a plug (male, with a groove) with a socket (female, with a collar).
| End | Shape | Job | Typical Home Use |
|---|---|---|---|
| Plug (male) | Ridged tip with a groove | Slides into the socket | Wand ends, tip collars, hose ends |
| Socket (female) | Shell with a spring collar | Grabs the plug’s groove | Gun base, wand socket, hose couplers |
| Thread-to-quick adapter | Threaded one end, click the other | Converts M22 to quick connect | Fitting a gun or wand with threads |
| Bushing/adapter | Reduces between sizes | Mates 1/4 and 3/8 components | Mixing tip sets across machines |
Two quick tests identify your machine’s size at a glance. Measure the plug’s diameter across the wide part with a ruler; 3/8-inch plugs measure close to 0.5 inch across the shoulder, and 1/4-inch plugs measure closer to 0.4 inch. Or check the threads at the pump end; an M22 thread measures roughly 22 mm and without a gauge, a visual match against a known-common connector gets you 95% of the way there.
Why Quick Connects Leak and How to Fix Them
A dripping quick connect is almost never a mystery. The socket’s internal O-ring seals against the plug, and every leak traces back to that O-ring, the plug’s groove, or the collar itself.
- Worn or missing O-ring: the leading cause. Pull the O-ring, wipe it clean, inspect it for nicks and flattening, and replace it with the correct size. A $2 O-ring solves the most common drip in pressure washing.
- Burred or scraped plug: a plug dragged across concrete or dropped in gravel picks up nicks that shred O-rings. Replace the plug; do not sand the face and blame the seal.
- Weak or reversible collars: some sockets accept plugs only one way round; a reversed plug sits on the O-ring at the wrong height and leaks. Check the collar engages with a clean click.
- Wrong-size plug: forcing a 1/4-inch plug into a 3/8-inch socket or vice versa does not seat the groove, so it leaks or blows apart under pressure. Match sizes honestly, or use the correct bushing.
- Debris on the coupling: sand, wax, and dried soap pack into the collar and hold it open. Clean and dry the coupling before connecting.
Rebuild kits for sockets exist and are cheap; they contain the O-rings and springs that restore a tired collar. Ten minutes with a kit beats buying a whole new set on every gun and wand, and the rebuild is covered in our complete quick connect leak-free guide, including how to keep O-rings greased and seated.
Building a Leak-Free Quick Connect System
Assemble your system the way a pro does, and leaks stop before they start.
- Standardize on one coupling size. Choose 3/8-inch for the main line and tips, or 1/4-inch for a compact machine, and stick to it everywhere you can.
- Use thread-to-quick adapters only where threads already exist. Put the quick connect at the gun base and the wand, not as an extra joint in the middle of the line.
- Lightly lubricate O-rings with silicone grease, never with detergent or petroleum products that attack the rubber.
- Always slide the collar fully back before connecting, and pull gently to confirm the click before running pressure.
- Replace O-rings seasonally. Rubber ages by calendar, not only by use, and a ring that feels fine in July can weep in March.
A system assembled that way converts five-minute changes into ten-second ones, and it protects the parts downstream, because a fitting that pops under full pressure whips the hose like a snake. That safety angle is exactly why pros refuse to use worn couplers anywhere on a live job.
Which Quick Connect Set to Buy
The market offers everything from $10 bundles to pro-grade brass sets, and the buying decision is about honesty, not brand loyalty.
| Set Type | Price Range | Best For | Trade-Off |
|---|---|---|---|
| Brass or stainless pro sets | $40+ | Frequent use, commercial, hot water rigs | Heavier in the hand, costs more |
| Steel sets with protective coating | $15-$35 | Homeowner, moderate use, cold water | Coating can wear; O-rings still the weak point |
| Economy nylon/coated sets | $5-$15 | Single machine, light duty | Collar springs wear fast; less rebuildable |
| Rebuild kits (O-rings and springs) | $5-$10 | Any set you already own | Cheapest long-term way to stay leak-free |
Match the set to the duty. A homeowner rinsing a car twice a month is well served by a competent steel set; a guy washing fleets every weekend wants brass or stainless and a rebuild kit in the kit bag. In both cases, buy two identical plugs of the main size so you always have a spare, because the plug, not the socket, is the part that gets dropped and damaged.
One more buying note before you check out: verify the socket’s collar actually travels and clicks before you mount it on anything. A defective collar right out of the package is rarer than a worn one but it happens, and returning a single socket is easier than rerigging a machine around a bad part. If a set arrives with an O-ring already cracked or flattened, get the whole set replaced rather than repair-guessing; a fresh kit that clicks clean is the entire point of the purchase.
Machines, Accessories, and the Fittings They Want
Different accessories change which fitting each side of the system needs, and thinking in terms of “the last inch” of each component saves every swap.
- Gun: most guns have a quick connect socket at the front (for the wand) and threads or a quick connect at the back (for the hose). Check both ends before buying adapters.
- Wand: lance ends are usually plug-style for tips, with interchangeable tip collars. A tip collar threaded at the base accepts color-coded nozzles.
- Surface cleaner: they connect by a quick connect plug at the top, sized to your hose; larger units may use M22 threads at the swivel instead.
- Extension wands and foam cannons: they follow the same plug-and-socket logic, so a single coupling size covers them all if you standardize.
If you own two machines of different GPM ratings, resist the urge to force a shared tip set on both; a tip sized for one pump can starve a faster one or over-pressure a slower one. Our guide to PSI versus GPM explains why matching tips to flow matters more than matching them to pressure.
Maintaining Fittings So They Stay Crisp
Quick connects reward small habits with years of service.
- Rinse couplings with clean water after every job, especially after soap runs, so dried chemicals do not attack O-rings.
- Dry fittings before storage, and store sockets upright so the O-ring is not sitting in water.
- Keep a small O-ring assortment in the machine’s case; a $3 assortment beats a ruined afternoon, and a repair on site is a repair that never becomes a comeback.
- Check collars for free travel each spring; a collar that sticks is a leak waiting to happen.
- Never hang the system by its fittings; hanging by the hose stretches collars and deforms plugs in storage.
Those habits belong on the same calendar as the rest of the machine’s care, and our spring maintenance checklist slots fitting checks alongside oil, filters, and nozzle care.
Installing Your First Coupler, Step by Step
Converting a machine from threaded to quick connect takes one straight-forward pass, and doing it deliberately the first time prevents the adapter salad you see in other people’s sheds.
- Inventory the threads. List every threaded end in the path: pump outlet, hose ends, gun base, gun front, wand base. Write down which are M22 male and which are M22 female before buying.
- Decide the coupling size. Default to 3/8-inch for the hose-to-gun path, and use 1/4-inch only for tip collars where the tips already use that size.
- Buy matching thread-to-quick adapters. For each thread you are converting, get a brass adapter that matches the thread on one side and either a plug or socket on the other, so the click connection lands between the gun and wand rather than inside the hose.
- Secure the threads. Wrap the adapter threads with two turns of quality thread sealant tape, wind it clockwise, and snug the adapter into the gun or wand with the correct wrench. Do not overtighten into a plastic housing.
- Lubricate the O-rings with a dab of silicone grease, then test the click at each new joint before pressurizing.
- Run a short pressure test. Start the machine with the trigger open, let it build, and check every new joint for a drip with the system under full pressure.
Note the order: thread sealant on the M22 side, grease on the O-rings, and never a drop of detergent anywhere near the seals. A minute spent on each joint now is an hour of leaks avoided later, and the finished rig looks intentional instead of improvised.
Troubleshooting Quick Connect Symptoms Fast
When a fitting misbehaves, the symptom narrows the cause in seconds.
| Symptom | Most Likely Cause | Quick Remedy |
|---|---|---|
| Leaks at the click joint | Worn or missing O-ring | Replace the O-ring and grease it |
| Won’t click or slides apart | Plug groove worn, collar spring tired | New plug or a collar rebuild kit |
| Drips right at the thread | Sealant tape missing or backwards | Rewrap and snug the adapter |
| Hard to push the plug in | Debris in the socket, dry O-ring | Clean, dry, light grease |
| Sprays sideways under load | Plug not seated in groove, mismatched size | Reposition until click; check size |
| Connects but loses pressure | Bore restriction, wrong-size coupling | Bigger bore or correct adapter |
Two spare O-rings and one spare plug in the case cover almost every failure a homeowner sees, and shops carry both for pennies. When the collar itself stops engaging reliably after dozens of connects a year, rebuild the socket, do not replace the whole set, because the socket shell is usually fine and the spring is the only tired part.
Hot Water, High Flow, and the Machines That Stress Fittings
The fittings that fly through a homeowner’s setup start to earn their keep differently when the work gets harder. Hot water units heat the fluid before it reaches the couplers, so every O-ring and collar faces heat as well as pressure. Cheap O-rings soften over 190-degree water, and a collar made of alloy that does not like the heat can bind. If you run a hot water rig, choose couplers explicitly rated for the unit’s temperature, keep a rebuild kit loaded, and replace rings more often than a cold water owner would.
High-flow machines present the other test. A 4 GPM pump moving serious volume through a 1/4-inch bore turns the fitting into a bottleneck, dropping effective PSI and starving the tip. Pros reading this thread in the pressure washing forum are the ones who buy 3/8-inch on the basis of flow, and they will tell you the same thing our hot water and flow buying guide does: match the coupling bore to the pump’s GPM, not to its PSI label, or you will under-clean despite the spec sheet.
Frequently Asked Questions
What size quick connect do most pressure washers use?
The common residential size is 3/8-inch, with 1/4-inch common on compact machines and for many tip collars. Measure the plug’s shoulder and compare against the bore table, or match against a known connector, to be sure before ordering.
Can I put a quick connect on any pressure washer hose?
Yes, provided you match the coupling and thread standards. Most modern hoses come with an M22 thread end; add a thread-to-quick adapter if the gun and wand are the quick connect style. Older machines may need an M22-to-M22 adapter to reach a common size.
Why does my quick connect leak even when it clicks?
A clean click means the collar engaged, but the actual seal is the O-ring. A worn, missing, or wrong-size O-ring leaks despite a good mechanical lock. Replace the O-ring, inspect the plug groove, and grease lightly before reconnecting.
Are brass quick connects worth the extra money?
For regular or commercial use, yes. Brass resists corrosion better, survives hot water, and in most brands rebuilds with the same inexpensive kits. For a homeowner rinter with cold water a few times a year, a good steel set gets the job done, especially when paired with fresh O-rings.
Do I need a coupler on both the gun and the wand?
You need one socket on each side you want to connect quickly. Typically the gun has a socket at its front and the wand has a plug at its base, so one click connects them without extra parts. Spare plugs and a bushing or two cover machines that use slightly different ends.
What is the difference between an M22 and a quick connect?
M22 is a threaded metric coupling, used mainly where the hose meets the gun and the pump. A quick connect is the click-style coupling used for wands and tips. They are different families, and one does not replace the other without an adapter that carries both ends.
Will quick connects reduce my pressure?
Not meaningfully if you match the bore to your flow. A well-made 3/8-inch coupler moves a homeowner’s GPM with negligible loss. The losses you can actually feel come from bottlenecking a high-GPM pump through an undersized connector, which is why the size matters more than the brand.
Can I use quick connects on both ends of the hose?
You can, and many people do: one end to the pump’s M22 outlet and one end to the gun base. Just remember the pump end does not need to be a quick connect for the wand to be one, and every extra joint is one more O-ring to keep greased. Standardize where the value is, the wand and tip swaps, and leave the pump end threaded if it already works.
How often should I replace quick connect O-rings?
At least once a season for a machine that sees regular use, and any time a joint starts to weep. Rubber dries and flattens by the calendar, so a ring that felt fine last fall can leak this spring even if the machine never moved. Keep a small assortment on hand and replace by condition, not by schedule alone.
The Bottom Line
Pressure washer quick connect fittings are the small upgrade with the biggest daily payoff: a click instead of a wrench, a clean joint instead of a drip, and a system that never slows you down at the least convenient moment. Get the size right with two quick measurements, keep the standard straight in your head (M22 threads versus quick connects), replace O-rings instead of living with weeds, and buy a set that matches your real duty, not just your wallet. Done that way, every fitting in the kit locks tight and stays leak-free for years, no matter how the machine behind it is spelled. And if you read this far as someone searching for a “presser” washer solution, know the spelling does not matter, the fitting does, and yours is almost certainly a 3/8-inch quick connect a couple of O-rings away from perfect.